Netwrix Setup Launcher
CAUTION: The PostgreSQL database must be installed before installing the application. It can be installed separately or through the Netwrix Setup Launcher. Also note that the application will require a server reboot at the end of the installation.
The Netwrix Setup Launcher checks for and installs missing prerequisites in addition to installing the database and application.
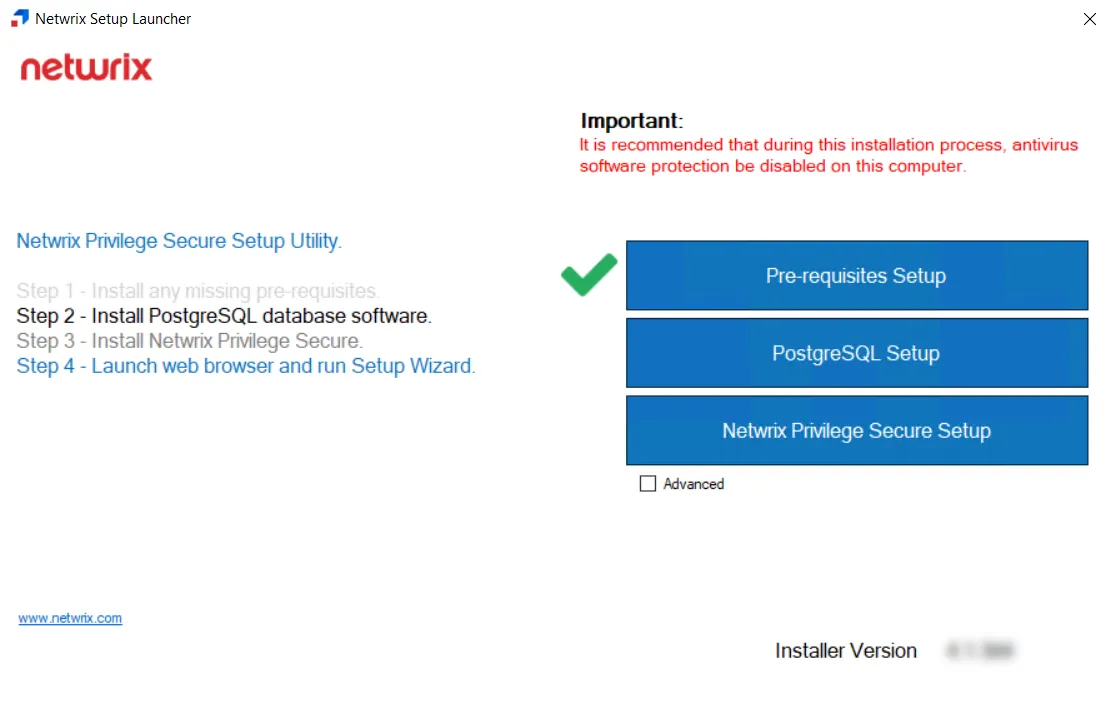
RECOMMENDED: Antivirus software should be disabled on this computer during the installation.
Right-click on the NPS_Setup.exe file and select Run as administrator. The Netwrix Setup Launcher will open. The launcher runs a prerequisites setup check. The green checkmark indicates the prerequisites have been met and you are ready to install the database.
CAUTION: The Advanced checkbox provides the option to switch databases to Microsoft SQLServer. This is not a recommended configuration and requires additional support from Netwrix.
Install PostgreSQL Database
RECOMMENDED: Antivirus software should be disabled on this computer during the installation.
Follow the steps to install the PostgreSQL database.
Step 1 – In the Netwrix Setup Launcher, click Install PostgreSQL 16. The PostgeSQL v16 Setup wizard opens.
NOTE: If PostgreSQL v16 is already installed, a green checkmark is displayed to the left of the Install PostgreSQL 16 button and you can install the Privilege Secure application.

Step 2 – On the Install page, click Install.
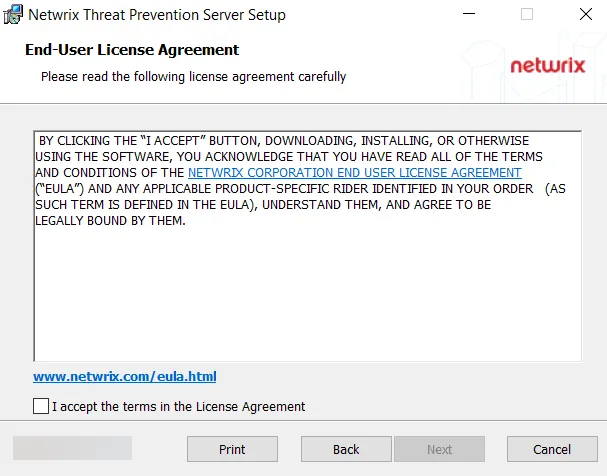
Step 3 – On the End User License Agreement page, check the I accept the license agreement box and click Next.
Remember, it is a best practice to read the agreement before accepting it.
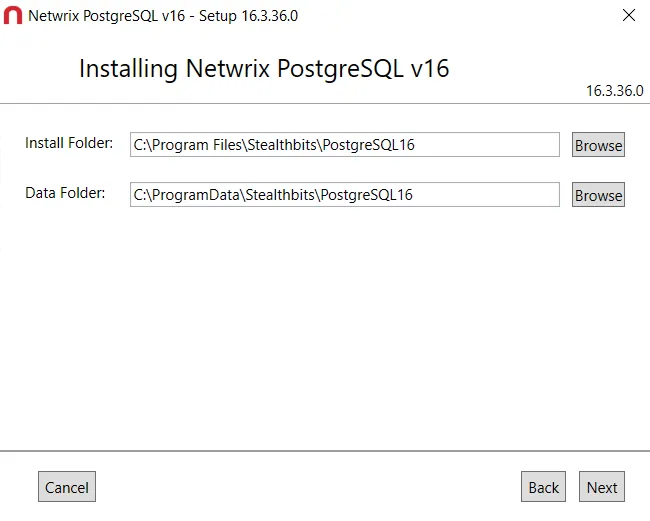
Step 4 – The default installation location for both the Install Folder and the Data Folder is:
C:\Program Files\Stealthbits\Postgres16
- To change the default location, click Browse and set a new location.
- When the location is set, click Next.
NOTE: The installation process begins and the Setup wizard displays the its Progress. This may take a few moments.

Step 5 – When installation is complete, click Exit. The Stealthbits PostgeSQL v16 Setup wizard closes.
NOTE: A reboot may be required.
The PostgreSQL database is successfully installed. It is time to install the application.
Install Application
RECOMMENDED: Antivirus software should be disabled on this computer during the installation.
Follow the steps to install Privilege Secure application.
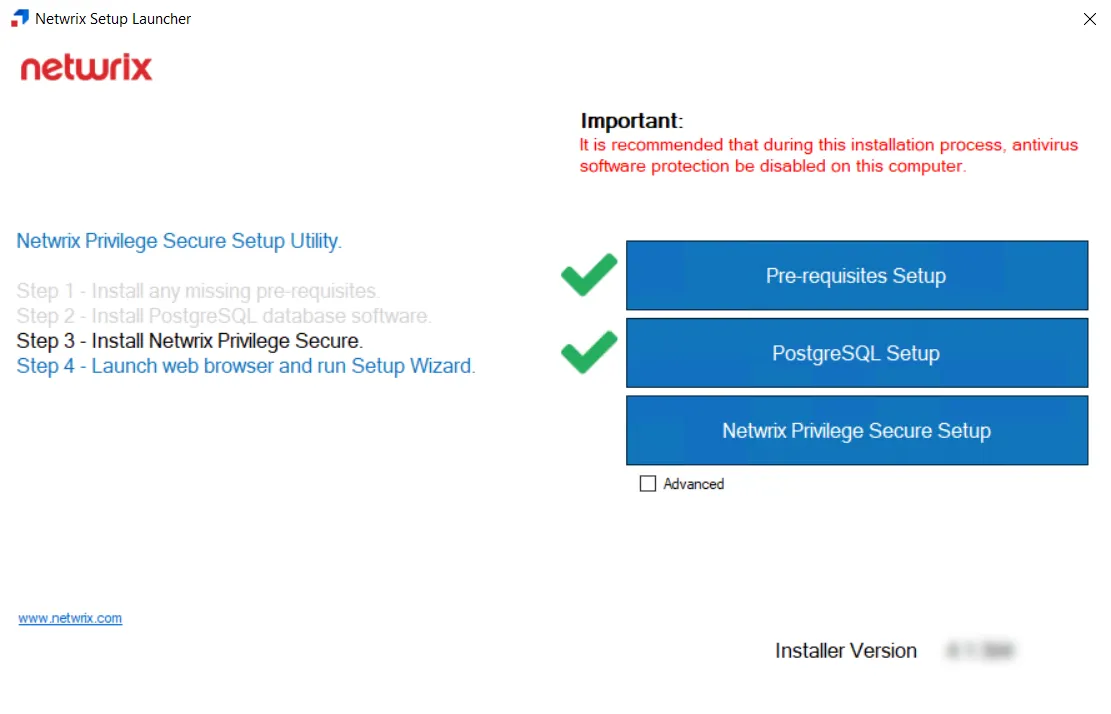
Step 1 – If you are using the Netwrix Setup Launcher, it displays a green checkmark for the PostgreSQL Setup. Click Netwrix Privilege Secure Setup.
NOTE: This window remains open in the background while the database is installed.
Step 2 – On the End User License Agreement page, check the I agree to the license terms and conditions box and click Options.
Remember, it is a best practice to read the agreement before accepting it.

Step 3 – The default installation location for Install Folder is:
C:\Program Files\Stealthbits\PAM
- To change the default location, click Browse and set a new location.
- When the location is set, click OK.
Step 4 – You will return to the End User License Agreement page. Click Install.
NOTE: The installation process begins and the wizard displays the its Progress. This may take a few moments.
Step 5 – When installation is complete, click Close.
The installer displays a message that it is applying permissions. The application will require a server reboot at the end of the installation.
Once installation is complete, open and walk through the Netwrix Privilege Secure Setup Wizard. The Wizard can be accessed through the Netwrix Privilege Secure desktop icon or locally on the default port. See the First Launch topic for additional information.