Add Active Directory Federation Services (AD FS) as an Authentication Connector (OpenID Connect)
Summary
This article outlines the process of adding Active Directory Federation Services (AD FS) to Netwrix Privilege Secure as an Authentication Connector via OpenID Connect (OIDC). The article is split into two sections, Steps for AD FS and Steps for Netwrix Privilege Secure. The AD FS section must be completed first.
Instructions
Steps for Active Directory Federation Services (AD FS)
-
Launch AD FS Management on the AD FS server:

-
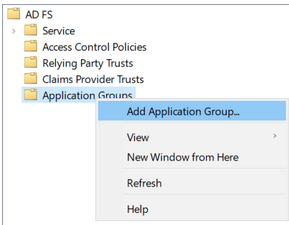
Right-click on Application Groups and select Add Application Group…
-
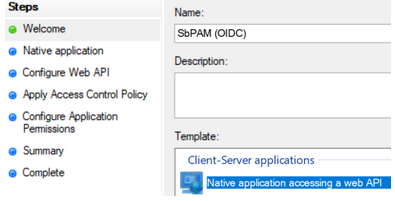
Select Native application accessing a web API and enter "SbPAM (OIDC)" as the Name, then click Next.
-
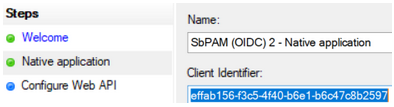
Copy the Client Identifier value; you will need that when configuring Netwrix Privilege Secure.
-
For the Redirect URI, use the Netwrix Privilege Secure server's URL followed by
/callback. For example:https://<sbpam-server>:6500/callback. Click Add, then Next.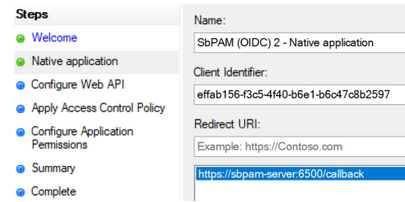
-
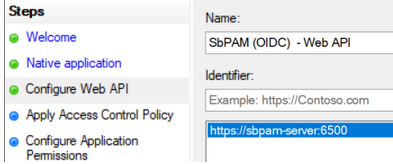
For the Identifier of the Web API, use the Netwrix Privilege Secure server's URL. Click Add, then click Next.
-
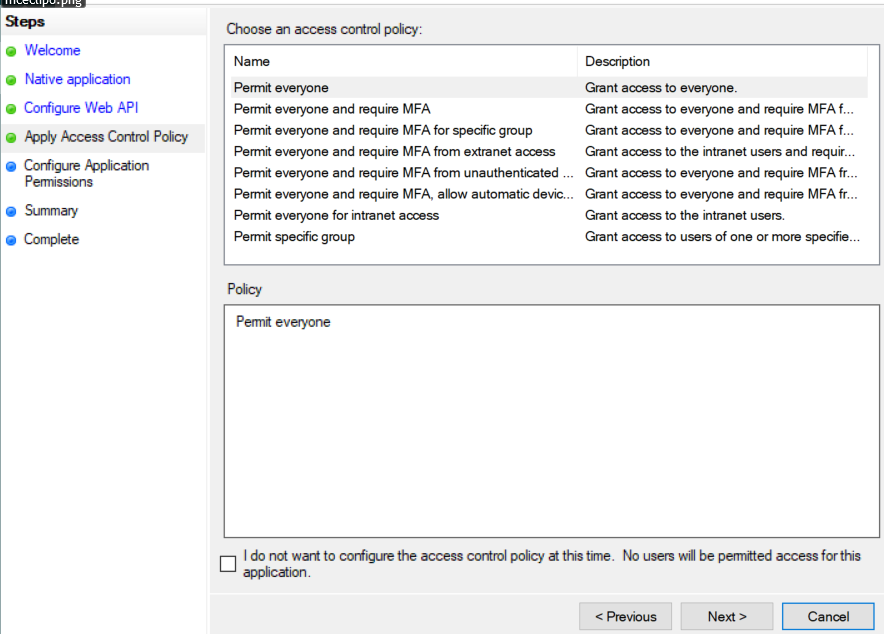
For Apply Access Control Policy, leave all defaults and then click Next.
-
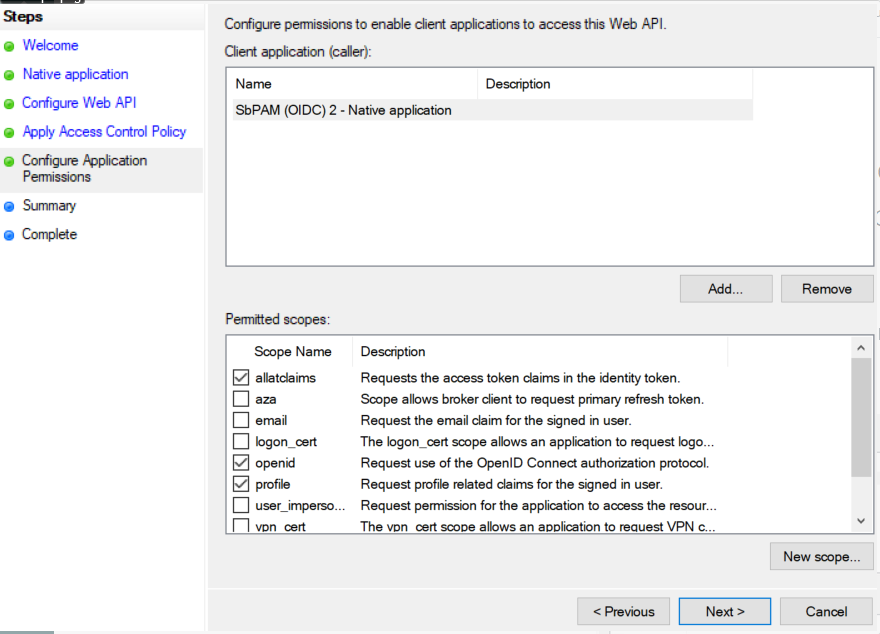
For Configure Application Permissions, enable the following and then click Next:
allatclaimsopenidprofile
-
Review the Summary, then click Finish.
-
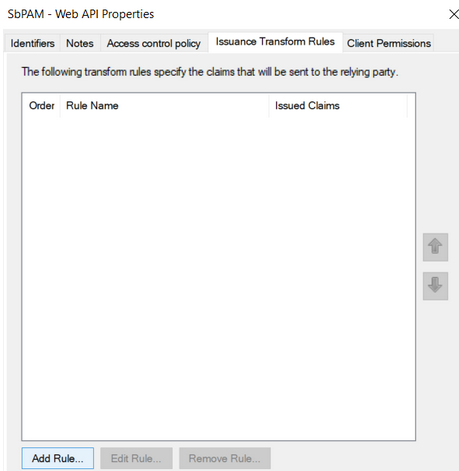
Double-click on the newly created Application Group, then double-click on the Web API application, then navigate to the Issuance Transform Rules tab. Click Add Rule...
-
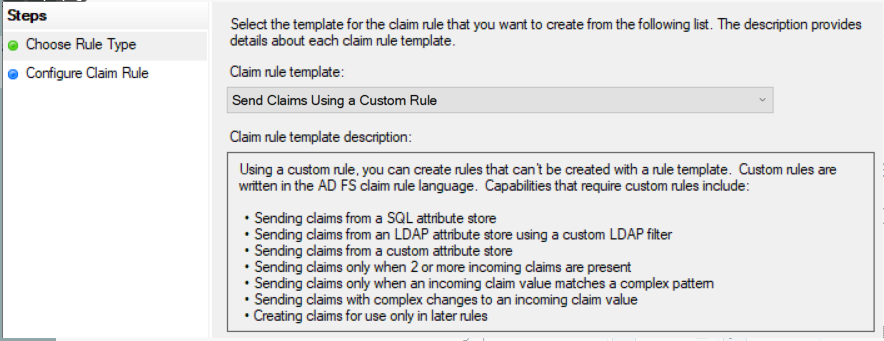
From the dropdown, select Send Claims Using a Custom Rule and click Next.
-
Name the rule "Send attributes", and add the following custom rule:
x:[]=> issue(claim = x);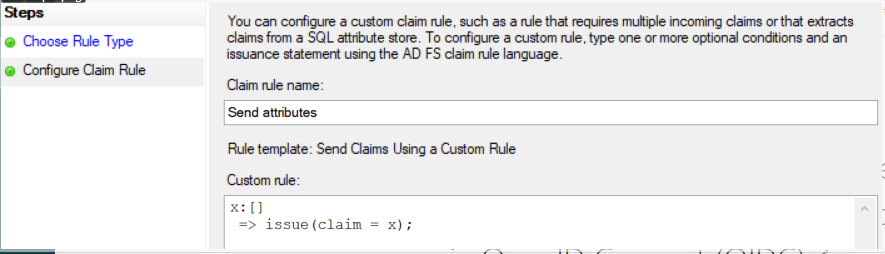
Click Finish, Apply, OK, then OK again. You can now close AD FS.
-
Open PowerShell as an administrator, and run the following commands to enable CORS for communication between the Netwrix Privilege Secure server and AD FS:
Before running the commands, make sure you capture any existing CORS settings since the
Set-AdfsResponseHeaderscommand will replace the existing values with the provided value.Set-AdfsResponseHeaders -EnableCORS $trueSet-AdfsResponseHeaders -CORSTrustedOrigins https://<sbpam-server>:6500 -
This completes the AD FS configuration portion of the guide.
Steps for Netwrix Privilege Secure
Once the Steps for AD FS have been completed, take the following steps in Netwrix Privilege Secure to add AD FS as an Authentication Connector via OIDC.
-
As a Netwrix Privilege Secure administrator, navigate in Netwrix Privilege Secure to Configuration > Authentication, and click the green "+" button to add a new Authentication Connector.
-
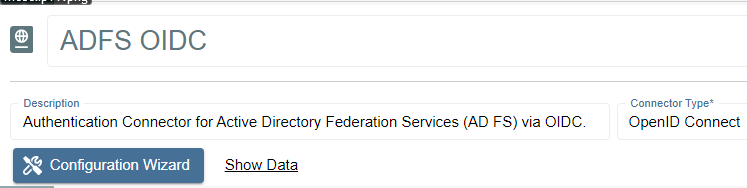
Give the new connector a name, description (optional), and a Connector Type of "OpenID Connect".
-
Click on Configuration Wizard.
-
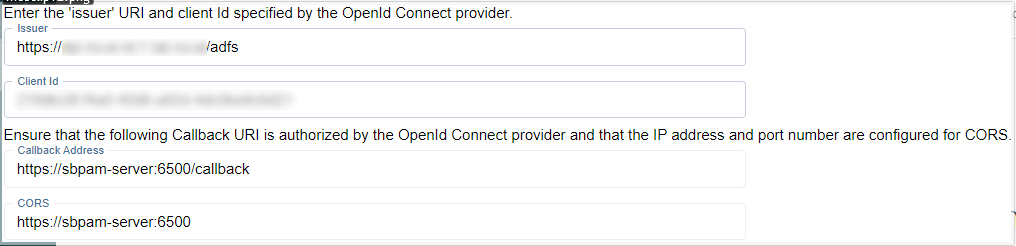
On the wizard's Configure Client page, enter the following values:
- Issue URI:
https://<adfs-server>.domain.com/adfs - Client Id: The Client ID noted in the previous steps for AD FS.
- Callback Address:
https://<sbpam-server>:6500/callback - CORS:
https://<sbpam-server>:6500
- Issue URI:
-
Click Test Connection. If brought to a log-in page, click Back in your web browser and then Next in the Netwrix Privilege Secure wizard. If the page refreshes and brings you back to the Netwrix Privilege Secure wizard, you should also click Next to proceed.
-
On the Test Login page, click Login. You'll be brought to an AD FS log-in page. Log in with Active Directory credentials, and you'll be brought back to the same page of the Netwrix Privilege Secure wizard. Click Next.
-
Click Get User Data. Locate a mapping you would like to use when users sign in to Netwrix Privilege Secure using AD FS, such as an email address or UPN.
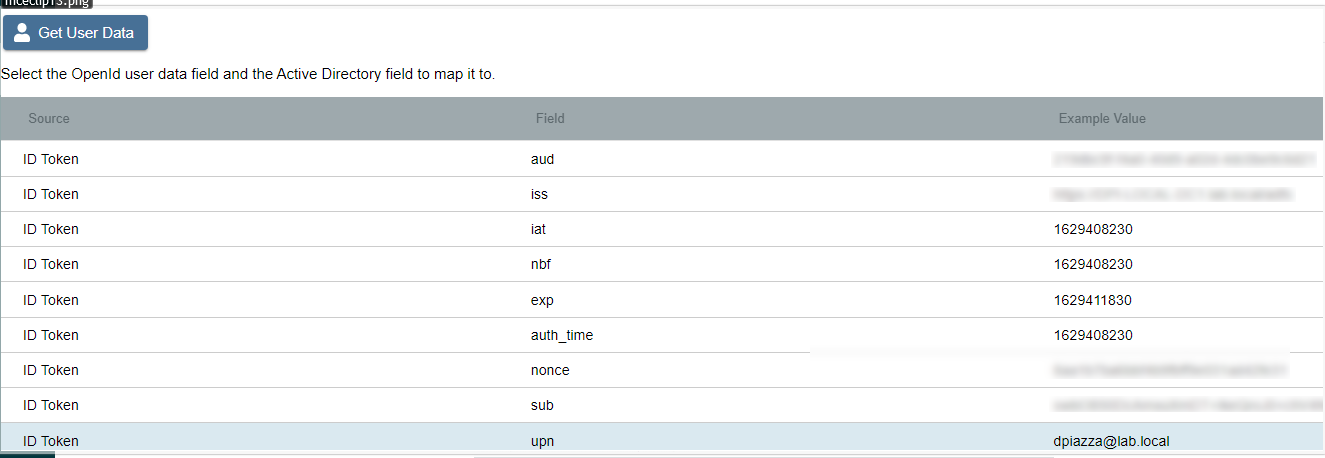
Click on the mapping, click Select, select the matching Active Directory mapping from the displayed dropdown, then click Finish.

-
The last step is to navigate to specific users in Netwrix Privilege Secure's Users & Groups menu, and assign the AD FS OIDC authenticator.
When using the OIDC log-in option, the user is redirected to log in to AD FS. Upon successful authentication, the user is redirected to the Netwrix Privilege Secure UI as their now logged-in user.