Adding Resources From a CSV File
Summary
Resources can be imported to Netwrix Privilege Secure from a CSV file, where each line of the CSV is a distinct DNS hostname.
Instructions
-
Create a CSV file that contains the distinct DNS hostname of the resources you would like to add to Netwrix Privilege Secure. For example:
-
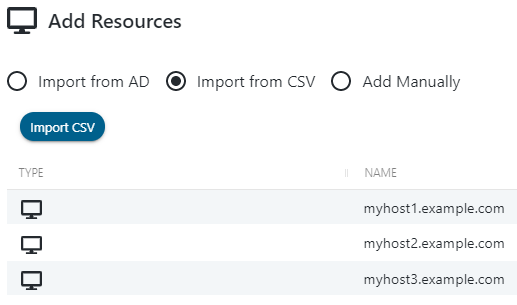
In Netwrix Privilege Secure, navigate to the Resources page. Click + Add, then select the Import from CSV radio button at the top of the dialog that appears.

-
Click Import CSV, then browse to and select the CSV of DNS hostnames you would like to import to Netwrix Privilege Secure.
-
The Add Resources page will now list the resources found in the CSV, with a row for each DNS hostname.
- In the bottom-right dropdown, select a Service Account that has previously been added to Netwrix Privilege Secure. This Service Account is used to scan each resource being added.
- When the desired Service Account is selected, click + Add to start the resource import. You can wait and view the status of each host scan, or close the window to allow scanning to continue in the background.
- As resources are imported, you will see them appear on the Resources page, along with information gathered by the host scan such as Operation System, DNS Host Name, and IP Address.