Slack Integration: Send Slack Message
Summary
This article describes how to set up a custom "Send Slack Message" action step in Netwrix Privilege Secure, which you can then add to activities.
Instructions
Preparing Your Slack App
A custom Slack application must be created for this integration.
- In Slack, navigate to the Your Apps page: https://api.slack.com/apps/
- Click Create New App
- Select From an app manifest and paste the following YAML into the provided field:
display_information:
  name: NPS App
settings:
  org_deploy_enabled: false
  socket_mode_enabled: false
  is_hosted: false
  token_rotation_enabled: false
- On the Your Apps page, select Incoming Webhooks.
- Under Activate Incoming Webhooks, click Add New Webhook to Workspace.
- Search for the channel you would like Netwrix Privilege Secure (NPS) to message. Click Allow. Copy the provided URL.
Importing the Action Step
- Download the Send-SlackMessage.zip archive to the SbPAM server: https://dl.netwrix.com/additional/Send-SlackMessage.Addon.zip
- Extract the archive, which contains a README file, an ActionTemplates directory, and an
Install-Addon.ps1script file. Right-clickInstall-Addon.ps1and select Run with PowerShell. - When prompted, select
Yto proceed.
- The PowerShell window should quickly execute the script and close.
- Log in to the SbPAM console. (If SbPAM was already open, be sure to refresh the console.)
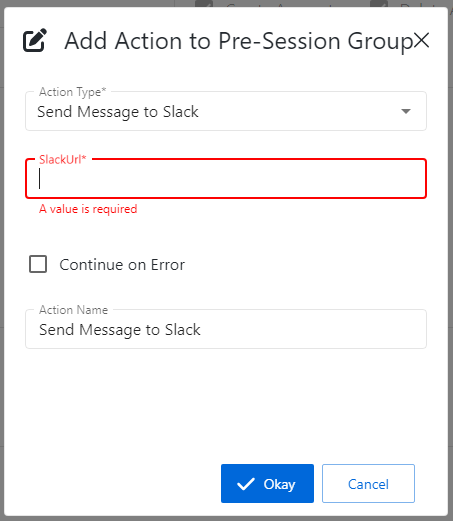
- In SbPAM, navigate to Activities, select an Activity, and click the green plus sign in either the Pre-Session or Post-Session. Note that the Send Message to Slack activity step is now available.
- Provide the URL from step 6 of Preparing Your Slack App when configuring the action step.