title: Installation Guide sidebar_label: Installation description: Step-by-step instructions for installing Recovery for Active Directory components including server, web console, and RSAT extension.
Installation
Recovery for Active Directory consists of the following components:
- Netwrix Recovery Server
- Netwrix Recovery Web Console – Installed on the Recovery Application Server and used to perform the operations the application offers
- RSAT Extension – Installed on the Recovery Application Server automatically. You can manually install it on a remote machine to add the object rollback and restore functions to the Active Directory Users and Computers console on that machine.
- Recovery Configuration Utility – Installed on the Recovery Application Server and used to register the RSAT Extension on the server. It also provides the option to update the SQL database password.
The following services are also installed on the Recovery Application Server:
- Netwrix Recovery Server service
- Netwrix Recovery Web Console service
To install the application, see the following topics:
Prior to installing, ensure that all prerequisites have been met, as described in the Requirements topic.
Licensing
Recovery for Active Directory comes with a temporary 7-day license. Please contact the Netwrix sales representative for a license.
See the Licensing Page topic to license the product.
Software Download
Current customers can log in to the Netwrix Customer Portal to download software binaries and license keys for purchased products. See the Customer Portal Access topic for information on how to register for a Customer Portal account.
Install the Application
The following components are installed by the Recovery for Active Directory installation package:
- Netwrix Recovery Server
- Netwrix Recovery Web Console – Installed on the Recovery Application Server and used to perform the operations the application offers
- RSAT Extension – Installed on the Recovery Application Server automatically. You can manually install it on a remote machine to add the object rollback and restore functions to the Active Directory Users and Computers console on that machine.
- Recovery Configuration Utility – Installed on the Recovery Application Server and used to register the RSAT Extension on the server. It also provides the option to update the SQL database password.
During a fresh installation, it is possible to modify both or either the application installation directory and the SQL Server database location. The application installation directory can be modified through the Destination Folder page in the Recovery for Active Directory Setup Wizard.
NOTE: The msoledbsql.msi must be installed on the machine the Recovery Application Server will
be installed on, prior to installing the Recovery Application Server. This allows the Recovery
Application Server to connect with the SQL Server. If it is not installed, the installer fails on
the SQL Server Configuration page. The
Microsoft OLE DB Driver for SQL Server
can be downloaded directly from Microsoft.
Follow the steps to install Recovery for Active Directory.
Step 1 – Run the NetwrixRecovery_Setup.exe executable as an administrator to launch the
Recovery for Active Directory Setup wizard.
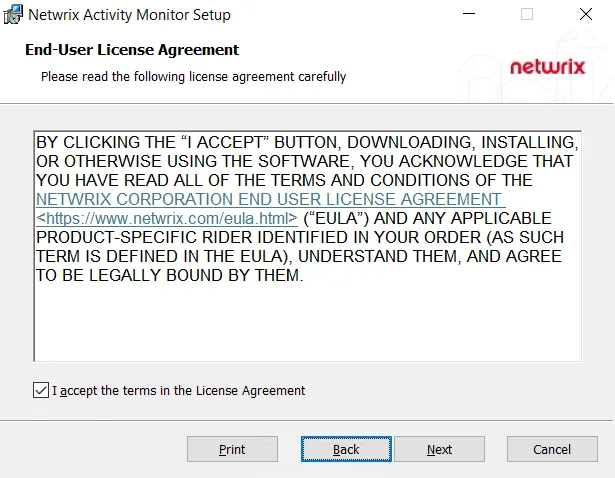
Step 2 – On the Netwrix Recovery for Active Directory page, read the End User License Agreement. Then check the I agree to the license terms and conditions checkbox and click Install.
The Setup Progress page displays the setup progress bar and then the Welcome page is displayed.
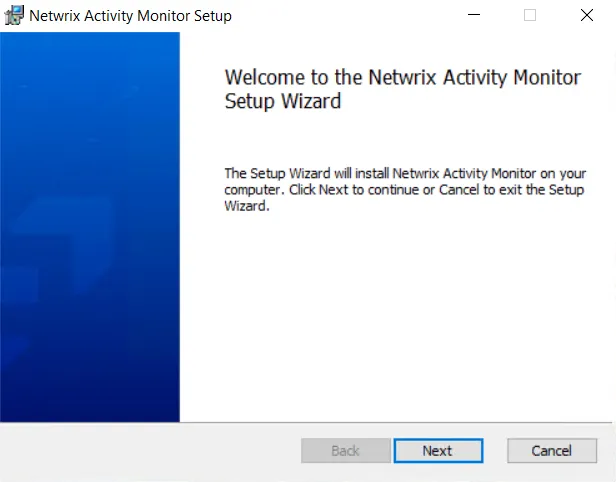
Step 3 – On the Welcome page of the Recovery for Active Directory Setup wizard, click Next to begin the installation.
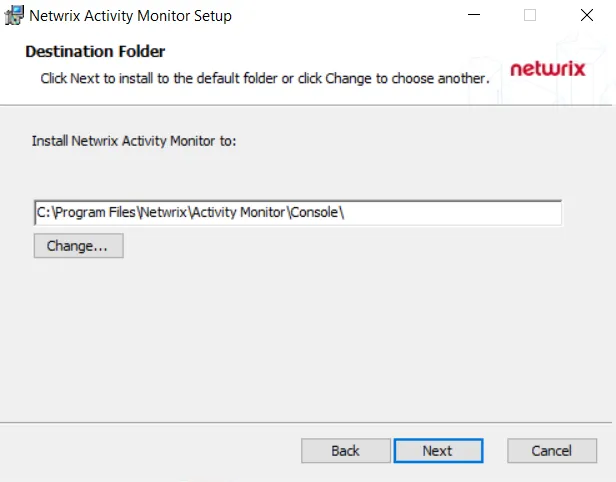
Step 4 – On the Destination Folder page, confirm the destination path where the wizard will install Recovery for Active Directory. The default installation location is:
C:\Program Files\Netwrix\Recovery for Active Directory\
- (Optional) Click Change… to change the installation location. The Change destination folder page opens.
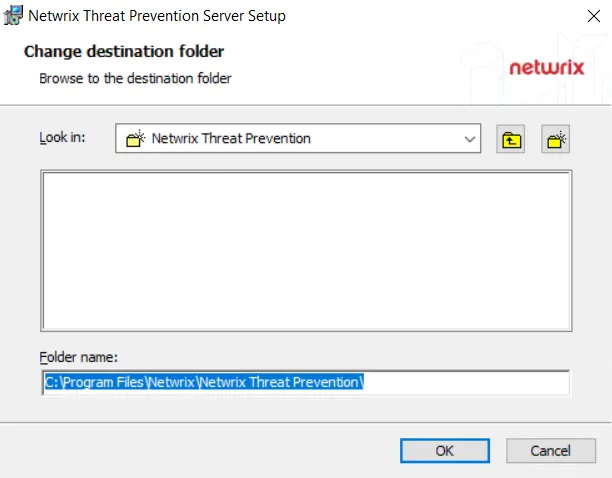
- Use the Look in field to select the desired installation folder.
- When the Folder name box is set as desired, click OK.
The wizard returns to the Destination Folder page. Click Next to continue.
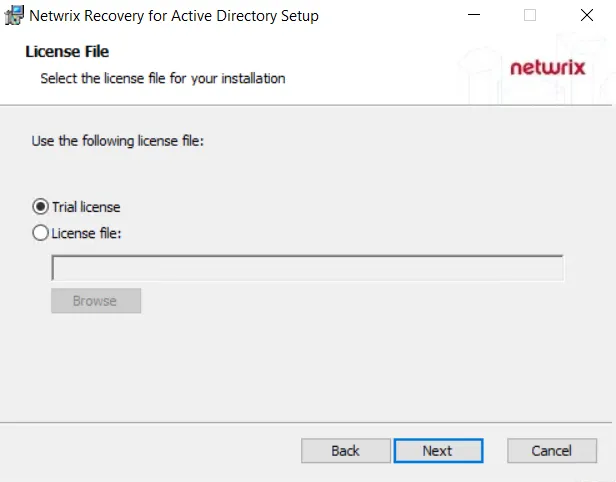
Step 5 – On the License File page, select the licensing option for your installation.
- Trial license – Use the 14-day license key that comes packaged with the Recovery for Active Directory installation
- License file – Map to a customer license key file by clicking Browse and selecting the license file with the name ending in .key
Click Next.

Step 6 – On the SQL Server Configuration page, specify the SQL server and credentials to use for database communication.
- SQL Server – Enter the SQL Server fully-qualified DNS location name or IP address of the SQL Server machine.
- Choose between Windows Authentication or SQL Server Authentication credentials. If SQL Server Authentication is selected, provide the login credentials for the provisioned account. Ensure that this account has access to read and write to the tables with permissions to execute stored procedures.
NOTE: Windows authentication will use the credentials of the account running the installer. Once the database is created, Windows authentication will use the credentials of the account used for the Recovery for Active Directory service., specified on the Netwrix Recovery Server Configuration page of the wizard.
Click Next.
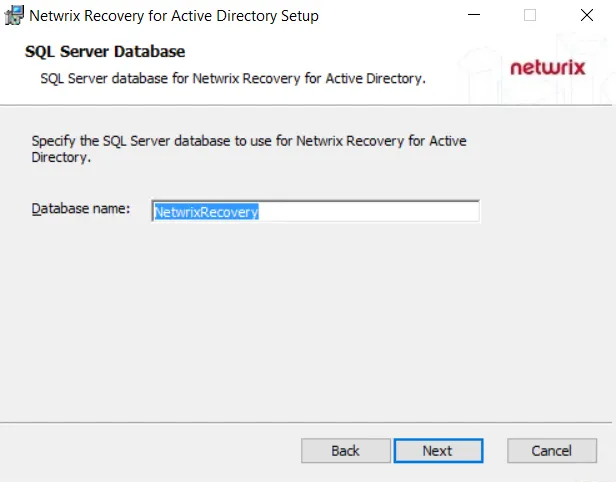
Step 7 – On the SQL Server Database page, specify the SQL Server database to use. Use the default database name or provide a unique, descriptive name in the box. Click Next to continue.
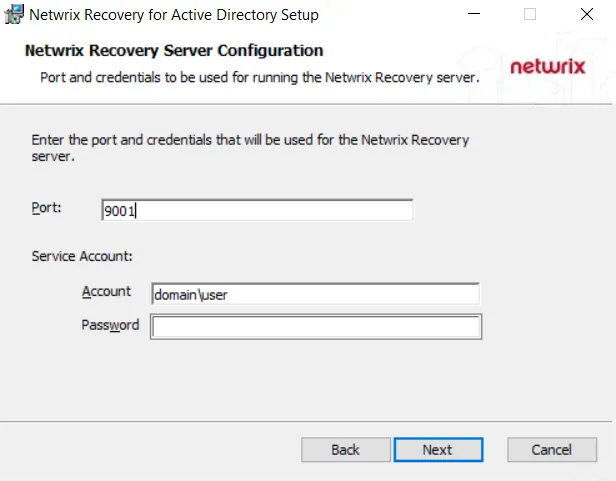
Step 8 – On the Netwrix Recovery Server Configuration page, enter the port and credentials to be used for running the application server.
-
Port – The default port number for the Netwrix Recovery server is 9001. This port is used to communicate from the Netwrix Recovery server and the domain. Modify the port, if needed.
-
Service Account – Enter the service account [DOMAIN\USERNAME] and password credentials used to start and run the Recovery Console service. Ensure that this service account has the Log On As A Service right in the Local Security Policies on the server where the console is installed.
Click Next.
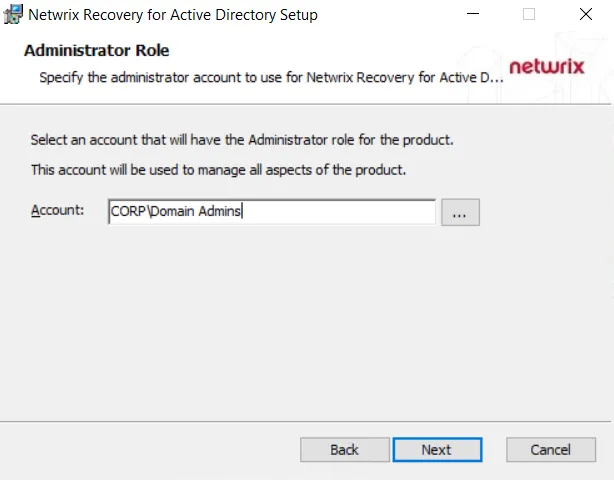
Step 9 – On the Administrator Role page, specify the administrator account to use. By default, this is set to the Domain Admins account from the domain the product is being installed into.
-
Account – Enter a user account or group [DOMAIN\ACCOUNT] that will be the default Recovery for Active Directory administrator. Use the Browse option to search for a specific account. This account will be locked and cannot be modified after installation.
The specified user or group will be responsible for configuring the applcation and managing users' access to the console.
Click Next.
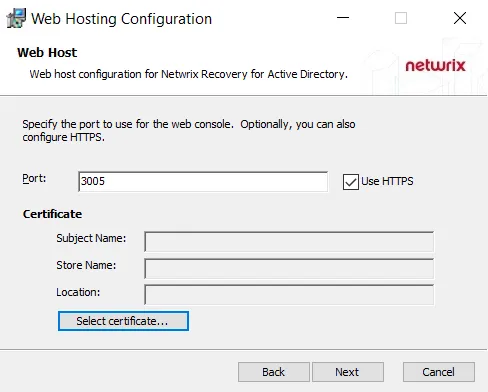
Step 10 – On the Web Host page, specify the web host configuration for the Recovery for Active Directory Console.
- Port – Use the default port number or provide a unique one.
- Use HTTPS – To enable HTTPS encryption, select the Use HTTPS checkbox. This displays the Certificate section on the page. Click Select certificate.... The Certificates window is displayed.

- The Certificates window displays installed certificates on either the local machine or the current user. Select the desired certificate and click Use Selected Certificate. This automatically fills in the information for the Certificate section of the Web Host page.
Click Next. Recovery for Active Directory is ready to install.
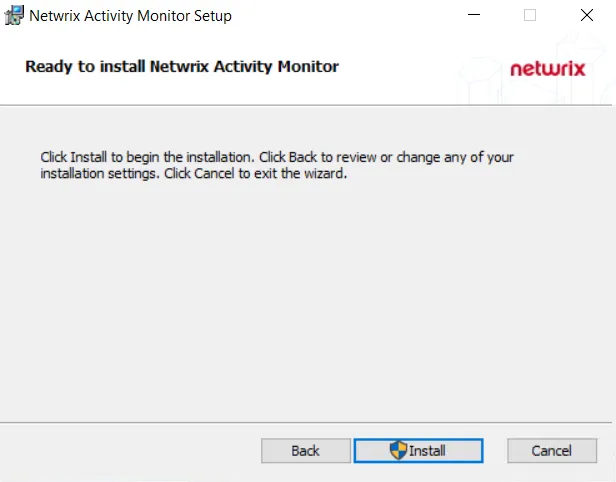
Step 11 – Click Install to begin the installation process.

Step 12 – The installation process begins and the Setup wizard displays the installation progress. Depending on the Active Directory size, installation may take time to complete. When installation is complete, click Finish to exit the wizard.
The installer does not automatically open the Recovery Console web page after installation. The Recovery Console icon is located on the desktop. See the First Launch topic for the next step.