Tag Management Page
The Tag Management page displays all tags that are managed by the application, including built-in and custom tags. You can add tags and assign objects to those tags.
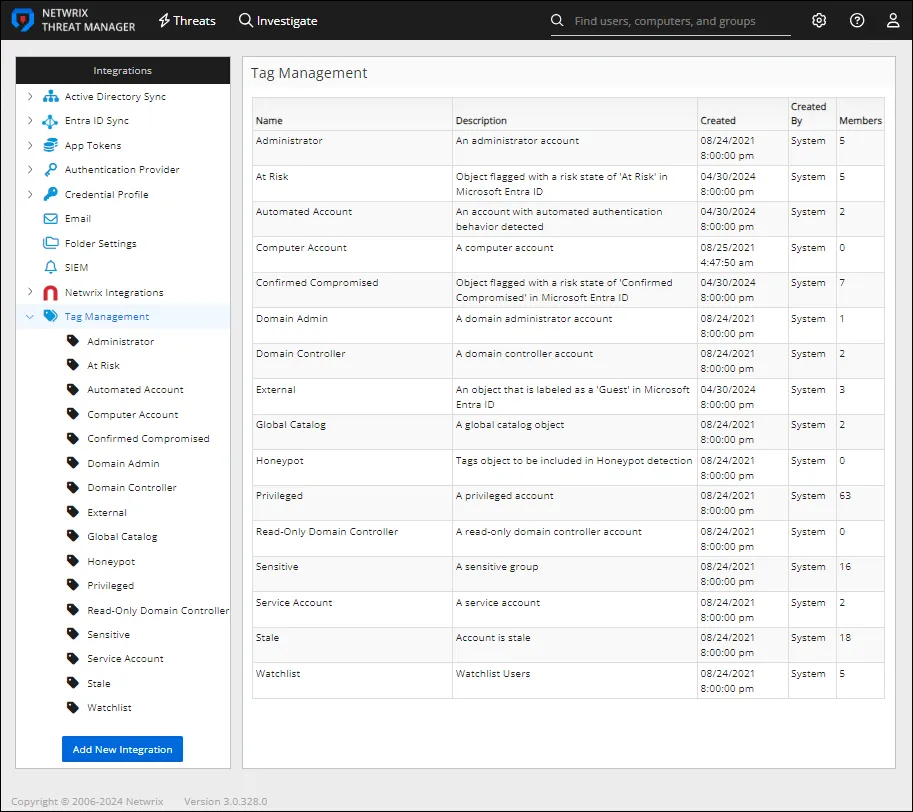
The built-in tags include:
- Administrator – An administrator user account
- Automated Account – An account with automated authentication behavior detected
- Computer Account – A computer account
- Domain Admin – An Active Directory domain administrator account
- Domain Controller – An Active Directory domain controller account
- Global Catalog – An Active Directory global catalog object
- Honeypot – Tags objects to be included in Honeypot detection
- Privileged – A member of a sensitive group. These users typically have access to sensitive systems and data and can execute actions that could impact the security, stability, and operation of the network or domain.
- Read-Only Domain Controller – A read-only Active Directory domain controller account
- Sensitive – A group that has elevated permissions or administrative rights. A member of these groups have the ability to perform critical tasks that can affect the security, configuration, and operation of the entire network or domain.
- Service Account – An Active Directory service account
- Stale – An Active Directory user account marked as stale
- Watchlist – Watchlist users
Any users with the Watchlist tag will be displayed on the Threat Manager Home Page Watchlist.
The table displays the following information for available tags:
- Name – The name of the tag
- Description – The description for the tag
- Created – Date timestamp when the tag was created
- Created By – The user account that created the tag
- Members – Number of tagged objects
Add New Tags
To add a custom tag:
Step 1 – Use the gear icon in the upper right corner of the console to open the Configuration menu. Then select Integrations to open the Integrations interface.
Step 2 – On the Integrations interface, click Add New Integration in the navigation pane. The Add New Integration window opens.

Step 3 – In the Type dropdown menu, select Tag.
Step 4 – Enter the following information:
- Name – Provide a unique, descriptive name for the tag
- Description – Provide a description for the tag
Step 5 – Click Add. The Add New Integration window closes.
The tag is listed in the Integrations navigation pane. It can now be applied to objects.
Tag Details Page
To view the details of a tag:
Step 6 – Use the gear icon in the upper right corner of the console to open the Configuration menu. Then select Integrations to open the Integrations interface.
Step 7 – On the Integrations interface, click Tag Managemetn in the navigation pane to view a list of tags.
Step 8 – Select a tag from the table or the navigation pane to view its details.

This page provides the following information:
- Name – The tag name. Type in the field to modify the name.
- Description – The tag description. Type in the field to modify the description.
- Delete Tag button – This button is only enabled for custom tags. Built-in tags can't be deleted. You will be asked to confirm the action.
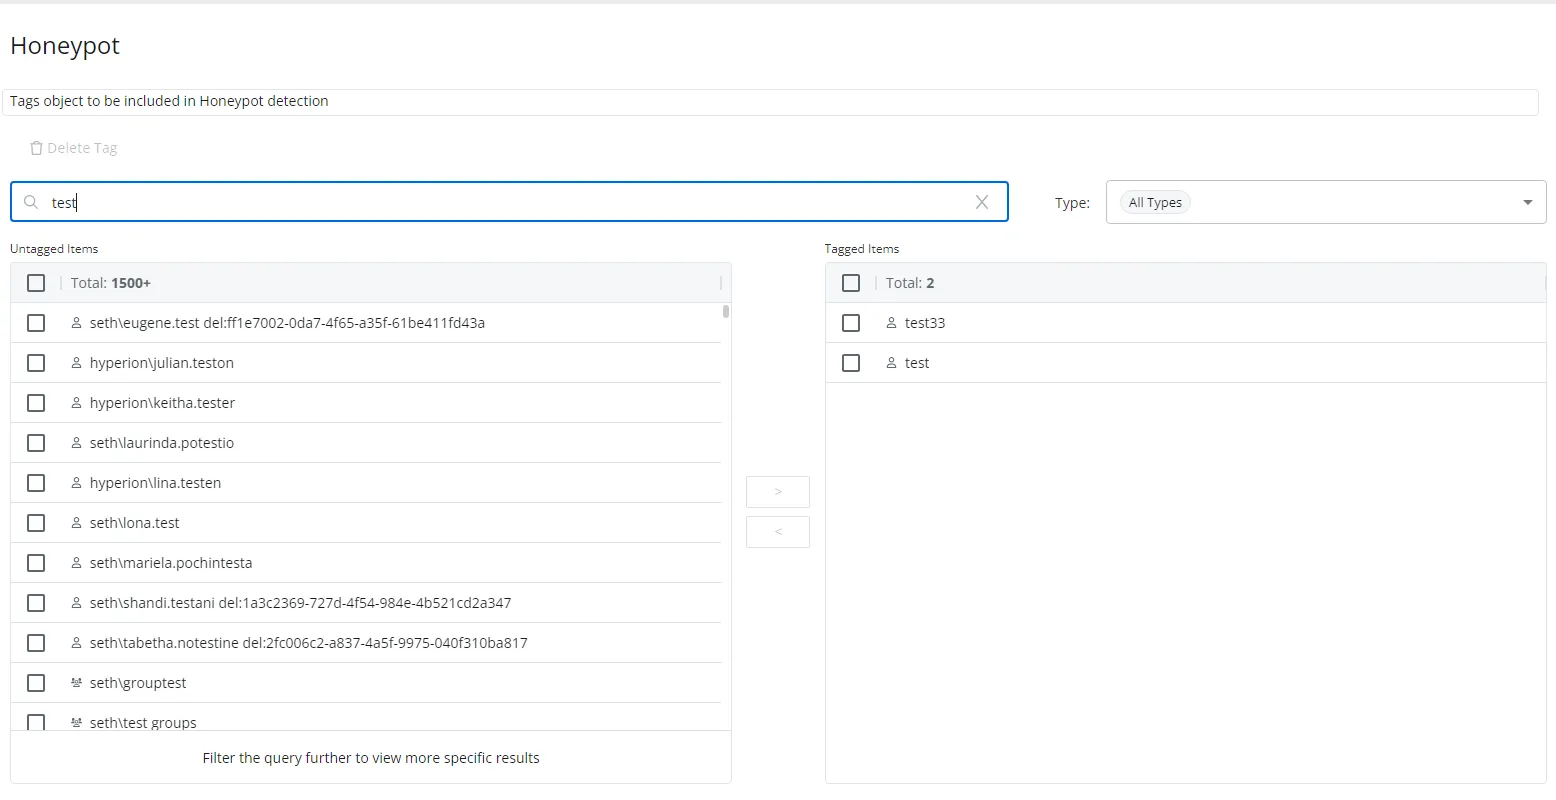
- Search box – Search for objects in the Untagged Items box and the Tagged Items box by typing in the textbox. You can search for user objects, group objects, file objects, or computer objects.
- Types – The dropdown menu provides object type filter options that apply to the search box results. When a search isn't being conducted, the filter types apply to the Tagged Items box.
- Untagged Items box – Displays objects that match the search text. This box is blank when a search isn't performed.
- Tagged Items box – Lists objects with this tag applied
Use the Type Filter
On the tag details window, click the Type dropdown menu to apply a filter.
Apply the Type filters you want when searching for objects to tag.
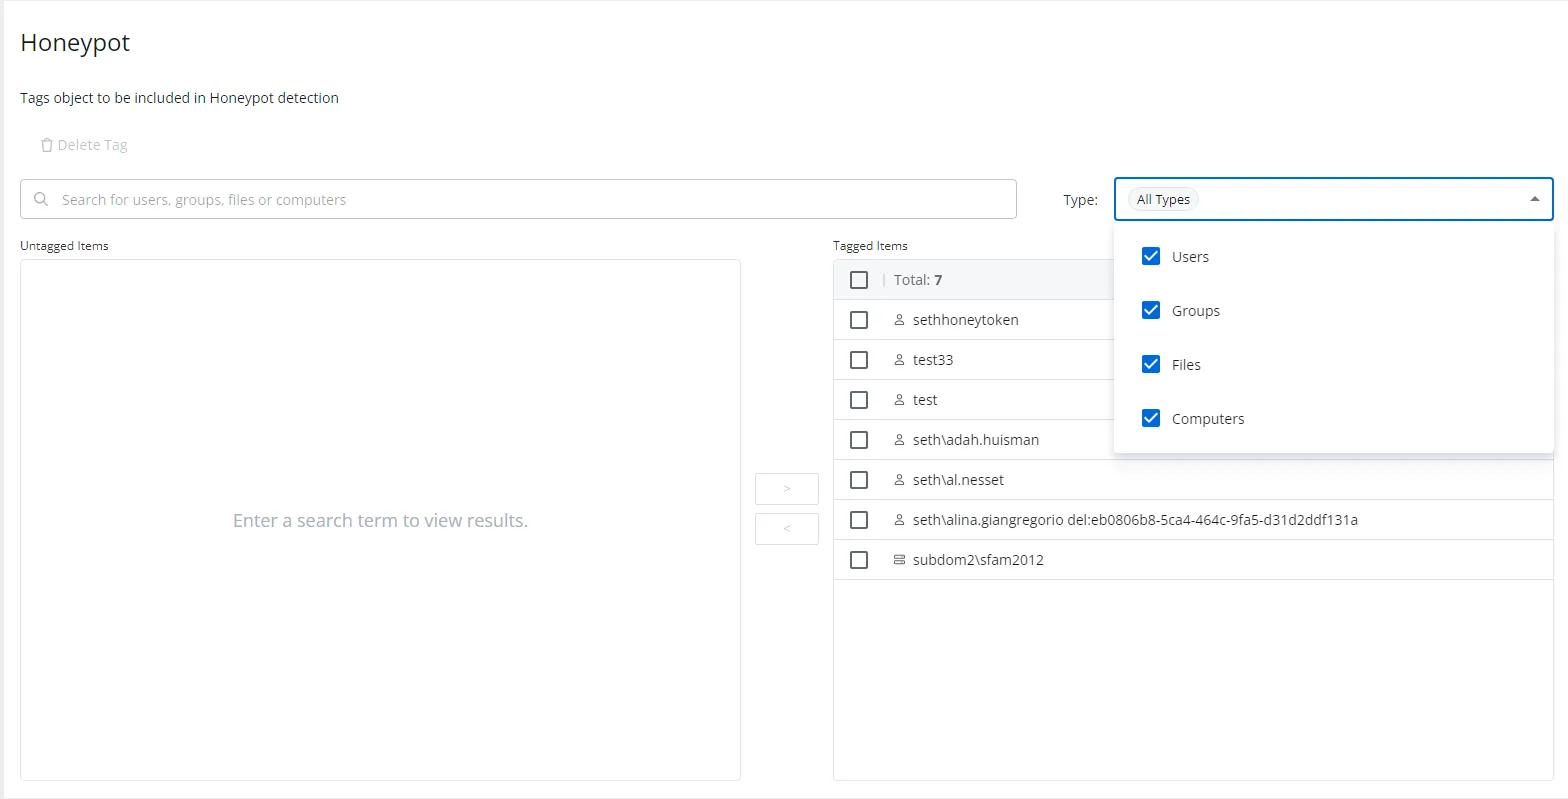
The following types are available:
- Users – Active Directory user objects
- Groups – Active Directory group objects
- Files – File objects
- Computers – Active Directory computer objects
The tagged items and untagged items lists on the window will be filtered to the selected object types.
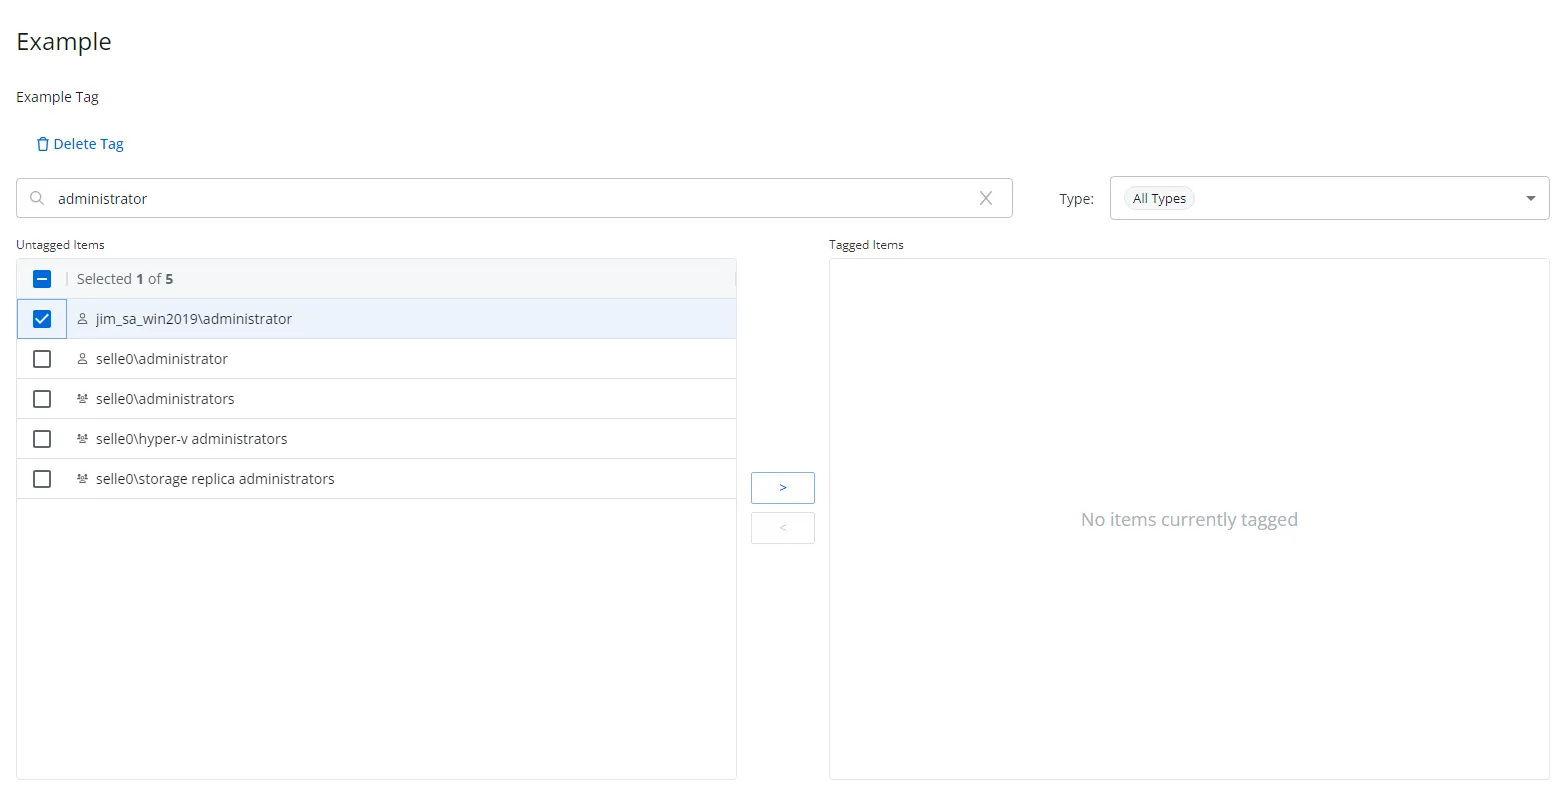
Apply Tags to Objects
To apply tags to objects:
Step 1 – On the Integrations interface, click Tag Managemetn in the navigation pane to view a list of tags.
Step 2 – Select a tag from the table or the navigation pane.
Step 3 – On the Tag details page, use the search box to conduct a search for the object name.
Step 4 – Use the Type dropdown menu to apply the object type filter you want to the search results.
Step 5 – In the Untagged Items box, check the box to the left of the objects you want.
Step 6 – Click the arrow () between the Untagged Items box and the Tagged Items box to add the tag to the selected objects.
The tag is applied to the selected objects.
Remove Tags From Objects
To remove tags from objects:
Step 1 – On the Integrations interface, click Tag Managemetn in the navigation pane to view a list of tags.
Step 2 – Select a tag from the table or the navigation pane.
Step 3 – On the Tag details page, use the search box to conduct a search for the object name.
Step 4 – Use the Type dropdown menu to apply the object type filter you want to the search results.
Step 5 – In the Tagged Items box, check the box to the left of the objects you want.
Step 6 – Click the arrow (<) between the Untagged Items box and the Tagged Items box to remove
the tag from the selected objects.
The tag is removed from the selected objects.