Upgrade PostgreSQL 14 to 18
PostgreSQL 14 reaches end-of-life on November 12, 2026. Customers may upgrade to PostgreSQL 18 at any time before that date. This upgrade is optional but recommended. Both the PostgreSQL 14 and PostgreSQL 18 installers are available concurrently, allowing you to perform the migration on your own schedule.
The upgrade process consists of the following steps:
- Update the existing PostgreSQL 14 installation to the latest minor version
- Update Netwrix Threat Manager to the latest version
- Install PostgreSQL 18 alongside the existing PostgreSQL 14 instance
- Move the Threat Manager database from PostgreSQL 14 to PostgreSQL 18
Step 1 – Update PostgreSQL 14
Before migrating, ensure your PostgreSQL 14 installation is on the latest minor version.
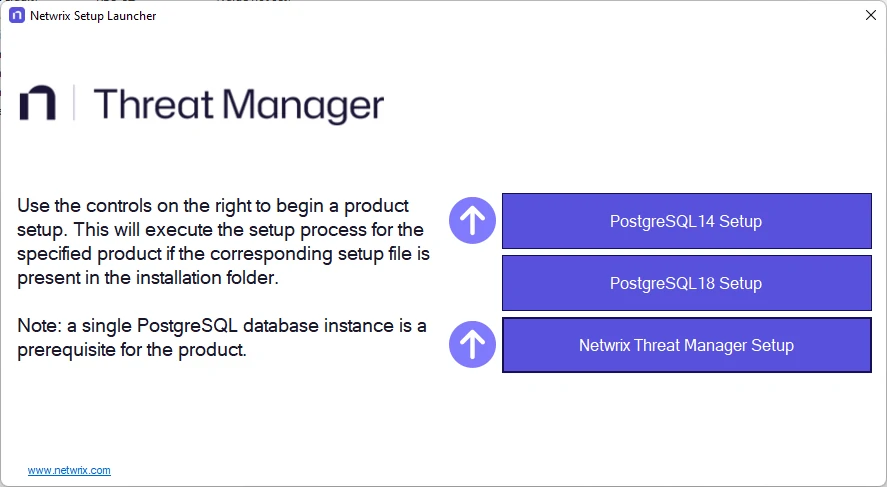
Step 1 – Run PostgreSQL 14 Setup
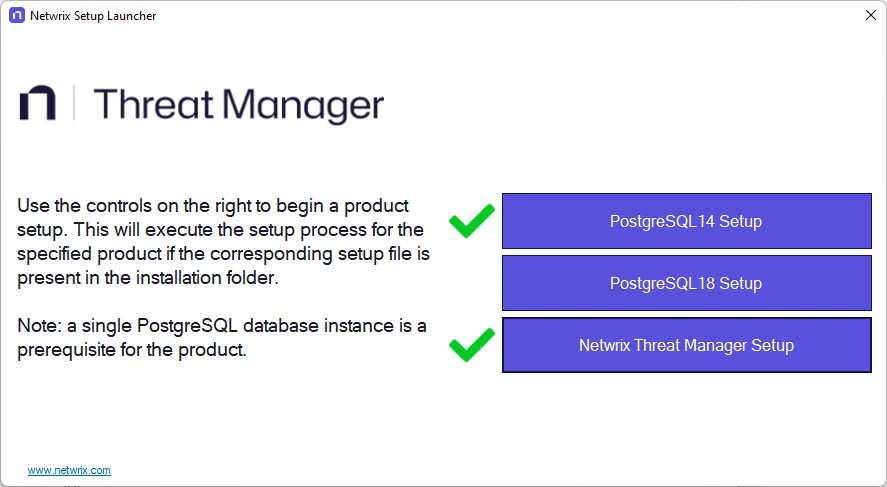
This step can be skipped if you already have a green checkmark here.
Step 2 – Follow the installer prompts to complete the PostgreSQL 14 update.
PostgreSQL 14 is now updated to the latest minor version.
Step 2 – Update Netwrix Threat Manager
Before installing PostgreSQL 18, update Threat Manager to the latest version.
Step 1 – Run Netwrix Threat Manager Setup
Step 2 – On the Connect to a Threat Manager Database page, confirm the host and port are set to the PostgreSQL 14 instance (port 5435). Click Test to validate the connection, then click Next.
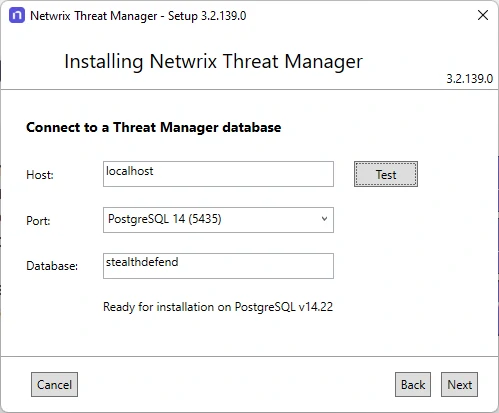
Step 3 – Complete the remaining installer steps and exit when the installation finishes successfully.
Threat Manager is now updated and still connected to PostgreSQL 14.
Step 3 – Install PostgreSQL 18
Multiple PostgreSQL instances can be installed on the same server simultaneously. After this step, your existing Threat Manager installation continues to use PostgreSQL 14 (port 5435) and the new PostgreSQL 18 instance will be empty (port 5439).
Step 1 – Run PostgreSQL 18
Step 2 – Follow the installer prompts to complete the PostgreSQL 18 installation.
PostgreSQL 18 is now installed on port 5439. Threat Manager still points to the PostgreSQL 14
database.
Step 4 – Move the Database to PostgreSQL 18
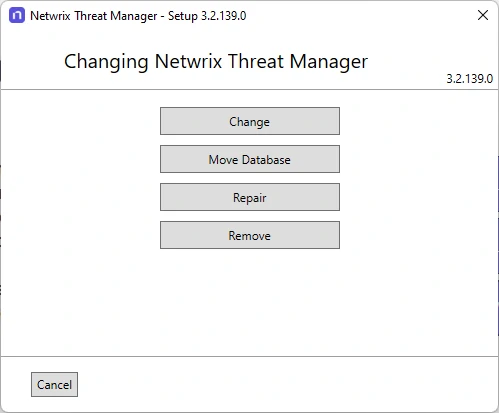
With Threat Manager updated, re-run the installer to perform the database migration. You will see this warning, it is safe to Install Again.
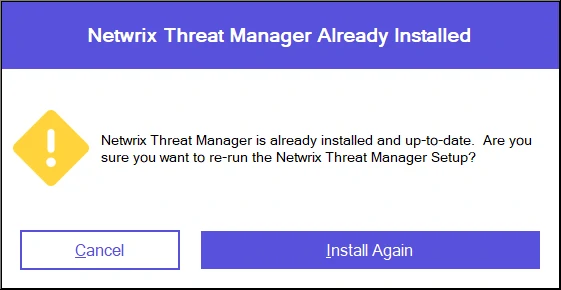
Step 1 – Run Netwrix Threat Manager Setup. You will be presented with additional options. Click Move Database.
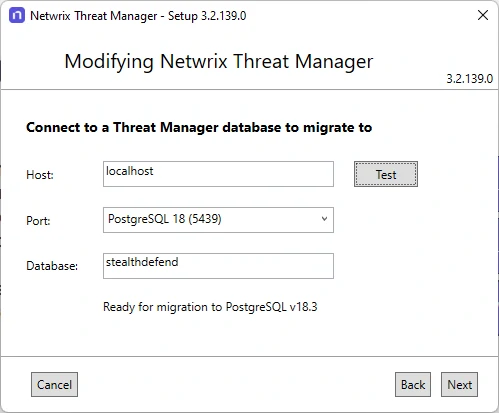
Step 2 – Set the target database to the PostgreSQL 18 instance (port 5439). Click Validate to check available disk space and connection. Then click Next.
Step 3 – Configure the following settings:
-
Only transfer events associated with a threat – Migrates only the events linked to detected threats. Select this option to reduce the size of the migration if you don't need the full event history.
-
Show Advanced Settings – Expands the following additional parameters:
-
PG Tools Directory – Path to the directory where PostgreSQL binaries are located.

-
Compression Level – Select the compression level applied to the exported data. Higher compression reduces the disk space required but increases migration time. Options:
- None – No compression is applied.
- Low – Lower compression; requires more disk space but completes faster.
- Medium – Balances disk space usage and migration speed.
- High – Highest compression; requires the least disk space but takes longer.
noteThe compression setting applies only to the exported data file. It doesn't alter the source or target database.

-
Number of Threads – Select the number of parallel threads used during the import. More threads can significantly reduce migration time. Options:
- Reliable – One thread.
- Recommended – Half the number of available processor cores.
- Performant – One thread per available processor core.
-
Reduce Source Database Size – Drops indexes in the PostgreSQL 14 database before migrating. This reduces the disk space needed for the migration but leaves the old database in a degraded state.
noteThis option isn't recommended. Use it only if you don't have enough free disk space to perform the migration with the default settings. The data in the old database is preserved, but the database will not function normally after the indexes are dropped.
Enabling this option also reveals a Delete Source Database checkbox. When selected, the old database is permanently deleted after the export completes.
warningDelete Source Database is an extreme option. Only use it if you fully understand its purpose. If the migration fails after deletion, you will need to manually restore the database from the export file.
-
The migration requires significant free disk space. The export file doesn't need to reside on the same disk as the database. The wizard will warn you if there is insufficient space to proceed safely.
Step 4 – Click OK, then click Next, then click Test. You will see the following confirmation.

Step 5 – Click Next to begin the migration. The installer will export the data from PostgreSQL 14 and import it into PostgreSQL 18.
Migrating a large database can take 24 hours or more. Threat Manager will be unavailable during this time.
The database has been moved to PostgreSQL 18.
Verify the Upgrade
After the migration completes, confirm that Threat Manager is now using PostgreSQL 18.
Step 1 – Open the Threat Manager Web UI.
Step 2 – Navigate to the System Health page.
Step 3 – Confirm that the reported PostgreSQL version is 18.

Clean Up
After confirming that Threat Manager is operating correctly on PostgreSQL 18, remove the PostgreSQL 14 installation and its associated data directory.
Uninstall the following from Programs and Features (or Apps in Windows Settings):
- Netwrix PostgreSQL 14
- PostgreSQL 14
Next, delete the old PostgreSQL 14 data directory. The default location is:
C:\ProgramData\STEALTHbits\PostgreSQL14
If the data directory was installed to a non-default location, look up the path in the Windows registry at:
HKEY_LOCAL_MACHINE\SOFTWARE\PostgreSQL\Installations\postgresql-x64-14
Verify that Threat Manager is fully operational on PostgreSQL 18 before deleting this directory. The data directory can't be recovered after deletion.
FAQ / Troubleshooting
What is port 5435?
Port 5435 is the port used by the Netwrix PostgreSQL 14 installation. Standard PostgreSQL defaults
to port 5432, but Netwrix offsets the port number based on the major version to avoid conflicts with
other software. The formula is: 5432 + (major_version - 11). For PostgreSQL 14, this gives port
5435.
What is port 5439?
Port 5439 is the port used by the Netwrix PostgreSQL 18 installation, following the same offset formula. Future major versions will follow the same convention — for example, PostgreSQL 19 would use port 5440.
How much free disk space is needed?
As a general rule, ensure you have at least 1.5 times the size of your current PostgreSQL 14 data directory available as free disk space before starting the migration. The export file is a compressed or uncompressed dump of the entire database and must be written to disk before being imported into PostgreSQL 18. The migration wizard will check available space during the Validate step and warn you if there isn't enough.
The export file doesn't need to reside on the same disk as either database. The migration wizard will prompt you if the default location doesn't have sufficient space.
Can PostgreSQL 18 be installed on a different server than PostgreSQL 14?
Yes. The Move Database wizard accepts a hostname and port for the target database, so PostgreSQL 18 doesn't need to be on the same machine as PostgreSQL 14. If using a remote server, ensure that port 5439 is open between the two servers and that the Threat Manager installer has network access to both instances during the migration.
However, Netwrix recommends installing PostgreSQL on the same host as Netwrix Threat Manager. Installing the database on a remote server may introduce network latency. If your goal is to move Threat Manager to a new host running PostgreSQL 18, the recommended approach is:
- Uninstall Netwrix Threat Manager from the PostgreSQL 14 host.
- Install PostgreSQL 18 and Netwrix Threat Manager on the new host, targeting the PostgreSQL 14 instance on the old host remotely during installation.
- Use the Move Database option to copy the remote PostgreSQL 14 database to the local PostgreSQL 18 instance.
Is rollback to PostgreSQL 14 possible after the migration?
Yes, as long as you have not completed the Clean Up section. The PostgreSQL 14 instance and its data directory remain intact until you explicitly uninstall them. To roll back:
- Edit
%ProgramData%\STEALTHbits\StealthDEFEND\appsettings.common.jsonand update the database connection to use port 5435 and the original PostgreSQL 14 database name. - Restart all Netwrix Threat Manager services.
After you have deleted the PostgreSQL 14 data directory as described in the Clean Up section, rollback is no longer possible without a separate backup.
If you enabled Reduce Source Database Size, the PostgreSQL 14 database indexes will have been dropped before the failure. The data is still present but the database will not function normally. In this case, contact Netwrix Support before attempting to re-run the migration.
What if NTM was accidentally pointed at port 5439 in Step 2?
If the Threat Manager installer was pointed at port 5439 during the update step, it will have created a new empty database on the PostgreSQL 18 instance. To recover:
-
Uninstall Netwrix Threat Manager.
-
Use pgAdmin to connect to the PostgreSQL 18 instance (port 5439) and drop the empty database that was created.
warningWhen connecting in pgAdmin, ensure you are connecting to the PostgreSQL 18 instance on port 5439. Do not connect to the PostgreSQL 14 instance (port 5435) and delete any database there — doing so will destroy your source data.
-
Reinstall Netwrix Threat Manager using
Netwrix Threat Manager Setup, this time targeting the PostgreSQL 14 instance on port 5435.
The migration failed mid-way — can it be re-run?
Yes. The Move Database wizard can be re-run by launching Netwrix Threat Manager Setup again and
selecting Move Database. If the import already started, the target database may already exist.
If this is the case, use pgAdmin to drop the new database first. Or choose a different name for
the new database.
When connecting in pgAdmin, ensure you are connecting to the PostgreSQL 18 instance on port 5439. Do not connect to the PostgreSQL 14 instance (port 5435) and delete any database there — doing so will destroy your source data.