List of Collections Window
Use the List of Collections window to add new items to a collection as well as edit and remove existing items.
Click Configuration > Collections on the menu to launch the Collection Manager Window. Then either double-click a Collection or select a Collection and click the Manage button to open the List of Collections window.
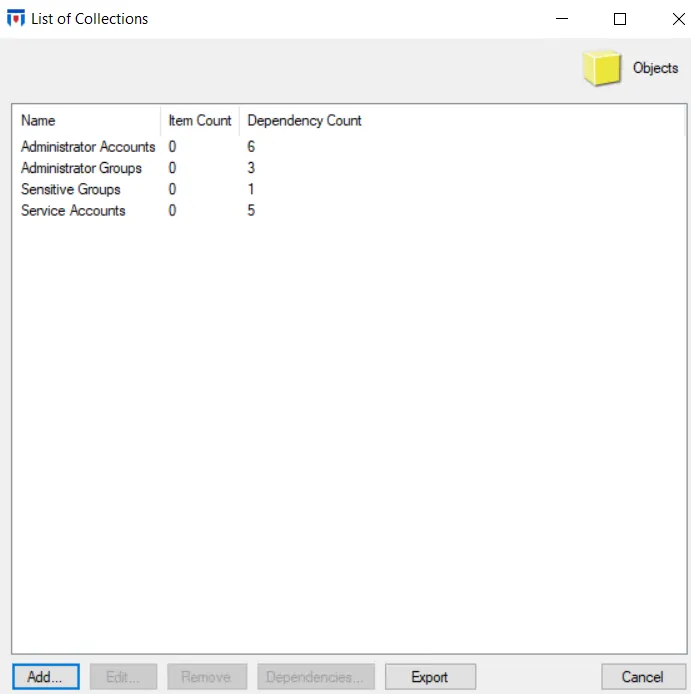
At the top of the window, the Collection Category is displayed. Each item in the list displays:
- Name – Name of the collection
- Item Count – Number of items in the collection
- Dependency Count – Number of policies or policy templates referencing the collection
Use the Add, Edit, Remove, Dependencies, and Export buttons to modify a collection.
Add New Collection Window
Follow the steps to add a static collection.
Step 1 – Click Add on the List of Collections window to open the Add New Collection window.
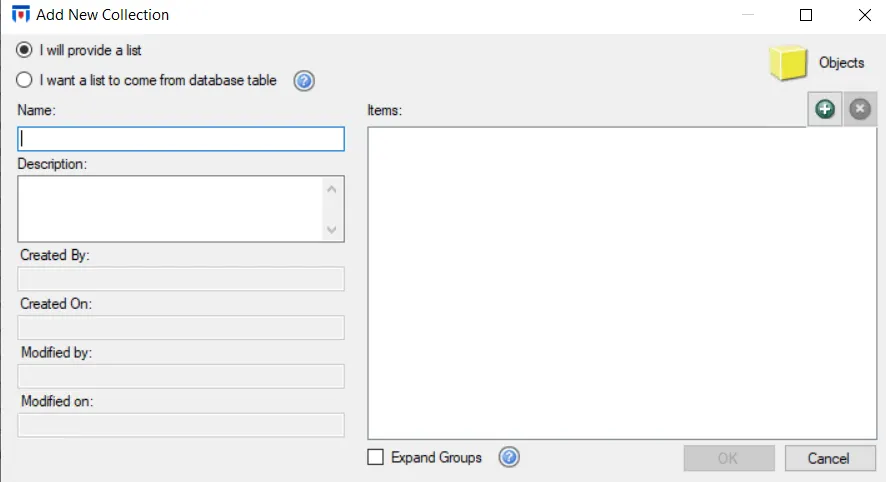
Step 2 – Select an option:
- The I will provide a list option button enables the default setting for a static collection.
- The I want a list to come from the database table option button enables a dynamic collection. Enter the table name in the textbox that appears or select it from the drop-down menu. See the Dynamic Collections topic for additional information.
Step 3 – Provide a unique, descriptive name for the collection in the name box.
Step 4 – Provide a detailed description in the Description box.
Step 5 – The Created By, Created On, Modified By, and Modified On boxes are automatically populated when collections are created or changed.
Step 6 – Use the Add (+) button to search for Items that match the selected Collection category.
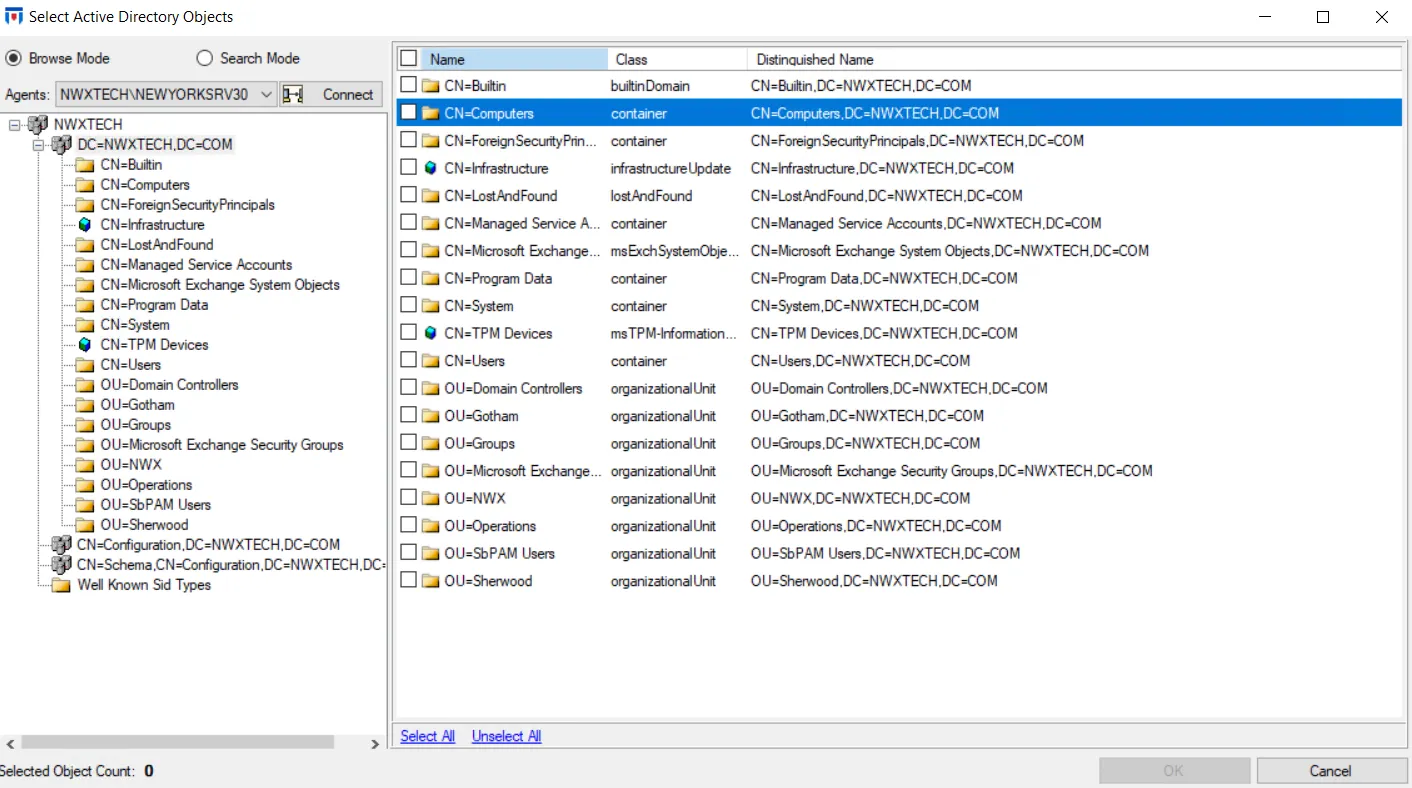
The Select… window opens. Select a server/Agent from the drop-down menu and click Connect. Expand the domain tree in the navigation pane. Select an item in the Results pane on the right and click OK. See the Selection Windows topic for additional information.
Use the Remove (x) button to remove Items from the list on the Add New Collection window.
Some collection can be configured to be dynamic collections. See the Dynamic Collections topic for additional information. The Perpetrators and Lockdown Perpetrators collections also have the option to expand group membership. See the Expand Groups Option for Perpetrators & Objects Collection topic for additional information.
Step 7 – When the configuration is set as desired, click OK to save the collection.
Expand Groups Option for Perpetrators & Objects Collection
The Expand Groups option on the Add New Collection window is only available for the following collections:
- Perpetrators
- Lockdown Perpetrators
- Objects
- Lockdown Objects

- For Perpetrators – If checked, the groups and nested-groups are expanded to monitor effective group membership at the user level. This means the Agent monitors/blocks based on the user’s token instead of the group’s token. The impact specifically for Lockdown Perpetrators collections is that this option allows for the immediate blocking of a currently logged in user who has had a group membership change while logged in.
- For Objects – If checked, when a group object is added, then the groups and nested-groups are expanded to monitor effective group membership at the user level. This means the Agent monitors/blocks based on the user’s token instead of the group’s token. The impact specifically for Lockdown Objects collections is that this option allows for the immediate blocking of a currently logged in user who has had a group membership change while logged in.
The Expand Groups option does NOT apply to other object types.
There is a maximum cap of 1000 users/objects that can be expanded. If the total number of users or objects of the groups added to a single collection exceeds 1000, then the Agent defaults to monitoring/blocking based on the groups’ tokens.
If group membership cannot be resolved, then the Agent defaults to monitoring/blocking based on the groups’ tokens.
Edit Collection Window
Step 1 – Select a collection on the List of Collections window and click Edit. The Edit Collection window opens.
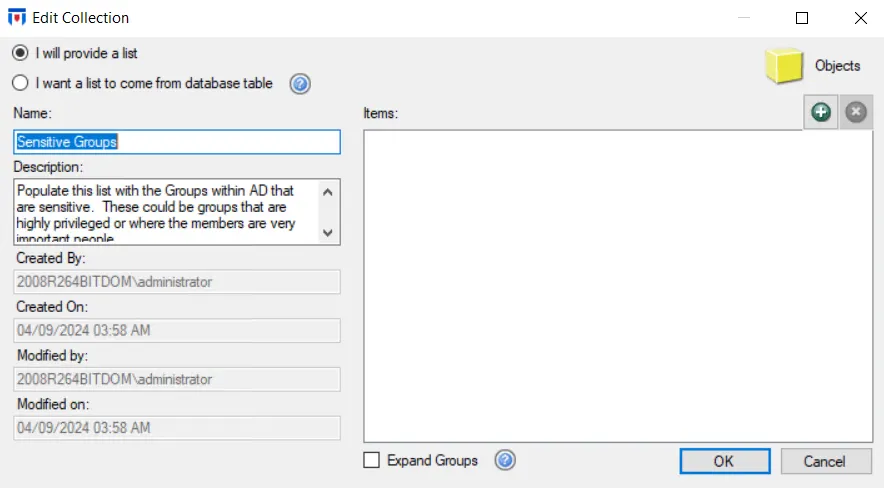
Step 2 – You can modify the name, description, and items in the collection. See the Add New Collection Window topic for additional information on these settings.
Remove Collection
Step 1 – Select a collection on the List of Collections window and click Remove.
You cannot delete a collection that is assigned to an active policy, as indicated in the Dependency Count column. Remove a collection from all policies it has been assigned to before deleting it.

Step 2 – Click Yes on the Confirm Removal window to delete the collection.
Collection Dependencies Window
Step 1 – Select a collection on the List of Collections window and click Dependencies to open the Collection Dependencies window.
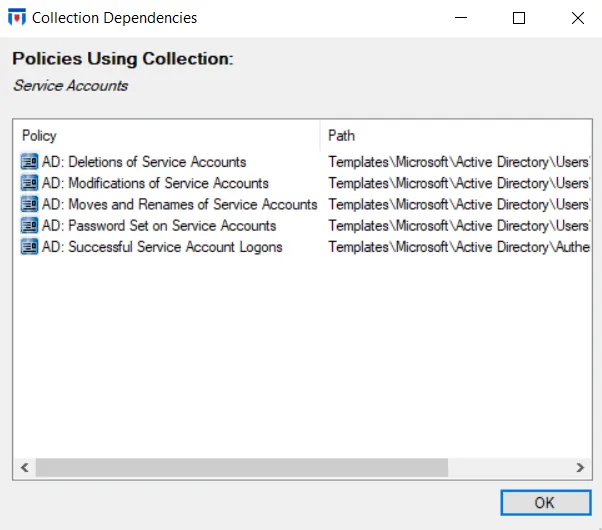
Step 2 – This window displays a list of all policy templates and policies the selected collection is assigned to. View the list and click OK.
Export Collections
You can select one or more collections on the List of Collections window and export their information to a TSV file.
Follow the steps to export a collection in the list.
Step 1 – Select one or more collections on the List of Collections window and click Export.
Step 2 – The Save As window opens. It displays the default file name and location where it will be saved. Modify if required and click Save.