SIEM Tab
Alert notification via SIEM sends event notifications to a SIEM product using UDP or TCP protocol. Before SIEM alerting can be enabled, the SIEM server must be configured.
Follow the steps to set up what events receive notifications.
Step 1 – Click Configuration > Alerts on the menu. The Netwrix Threat Prevention System Alerting window opens.
Step 1 – Click the SIEM tab.
Step 2 – Click Configure to configure a SIEM server. See the Configure a SIEM Server topic for additional information.
Step 3 – Once configured, click Events on the SIEM tab.
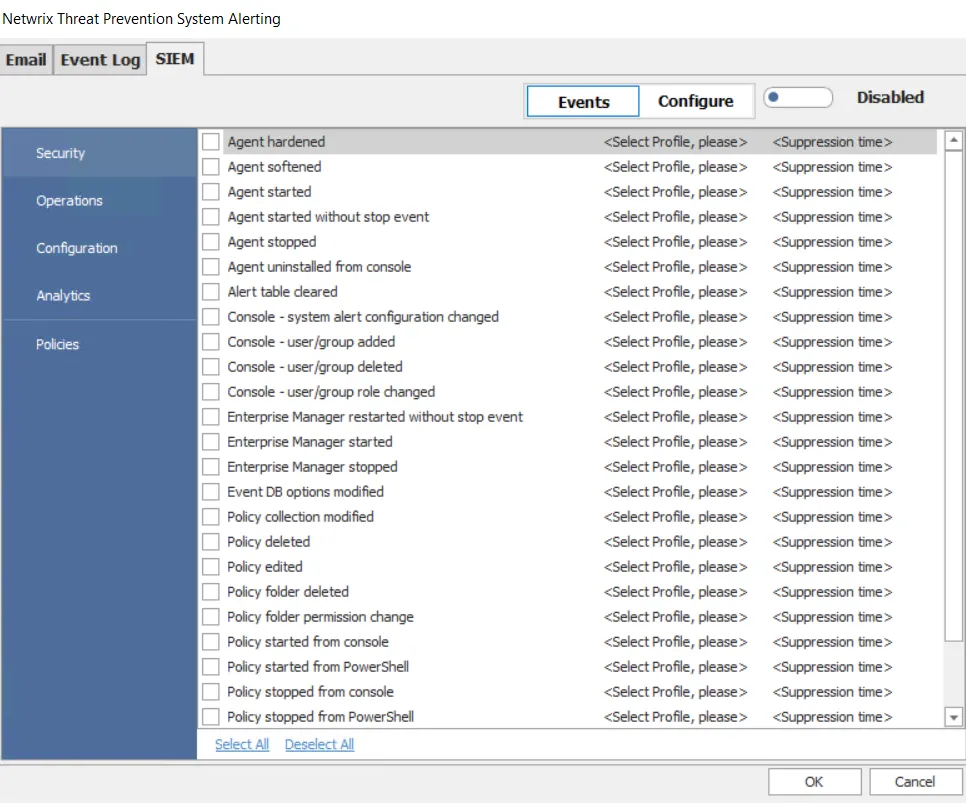
Step 4 – Click the button next to Disabled to toggle the setting to Enabled.
Step 5 – Select an event category (Security, Operations, Configuration, Analytics, Policies) in the left pane.
You can set a SIEM mapping file for each type of event category, as discussed in the Configure a SIEM Server topic.
Step 6 – Check the checkbox for the event/incident/policy for which you want to trigger SIEM notifications.
Step 7 – Click the Select Profile, please drop-down menu for an event/incident/policy and select a SIEM Profile to assign to it. When an alert is generated for the event/incident/policy, a notification will be sent to the SIEM server specified in the SIEM Profile.
- For policies, multiple profiles can be assigned by either checking the desired profile(s) or the Select All option. Click OK in the drop-down menu to confirm the selection.
You can assign a profile to as many events as required.
Step 8 – For the Security, Operations, and Configuration event categories, the Suppression time option is also available for each event. Use it to prevent Threat Prevention from generating alerts for an event for a specified time period. This limits the volume of repeat alerts for the respective event.
Click Suppression time for an event and select an option from the drop-down menu:
- A duration ( 1 min, 2 min, 5 min, 10 min, 30 min, 60 min) – Once an alert is generated for the event, Threat Prevention will not generate another alert for it during the next X minutes (X is the duration you selected) even if the event occurs.
- Disabled – Alerts will not be suppressed
Example
You select a suppression time of 30 minutes for an event. Next, an alert is generated for that event. If the event occurs again within the next 30 minutes, an alert will not be generated.
The suppression time feature enables you to tackle situations where numerous alerts are generated for an event, such as Agent Latency, causing the Enterprise Manager and Administration Console to freeze.
Step 9 – For Analytics, choose whether or not to enable Ongoing Attack Alerts. When checked, Threat Prevention sends periodic reminders of an ongoing attack if it continues after the initial notification has been sent.
Step 10 – Click OK to save the settings.
Threat Prevention now sends SIEM notifications for the selected events/incidents/policies to the SIEM product configured in the assigned SIEM profile. All notifications sent to SIEM are also displayed on the SIEM Output Viewer window.
Configure a SIEM Server
Multiple profiles can be created across SIEM servers to serve different alerting functions. Follow the steps to configure one or more SIEM servers for alerting.
Step 1 – Click Configuration > Alerts on the menu. The Netwrix Threat Prevention System Alerting window opens.
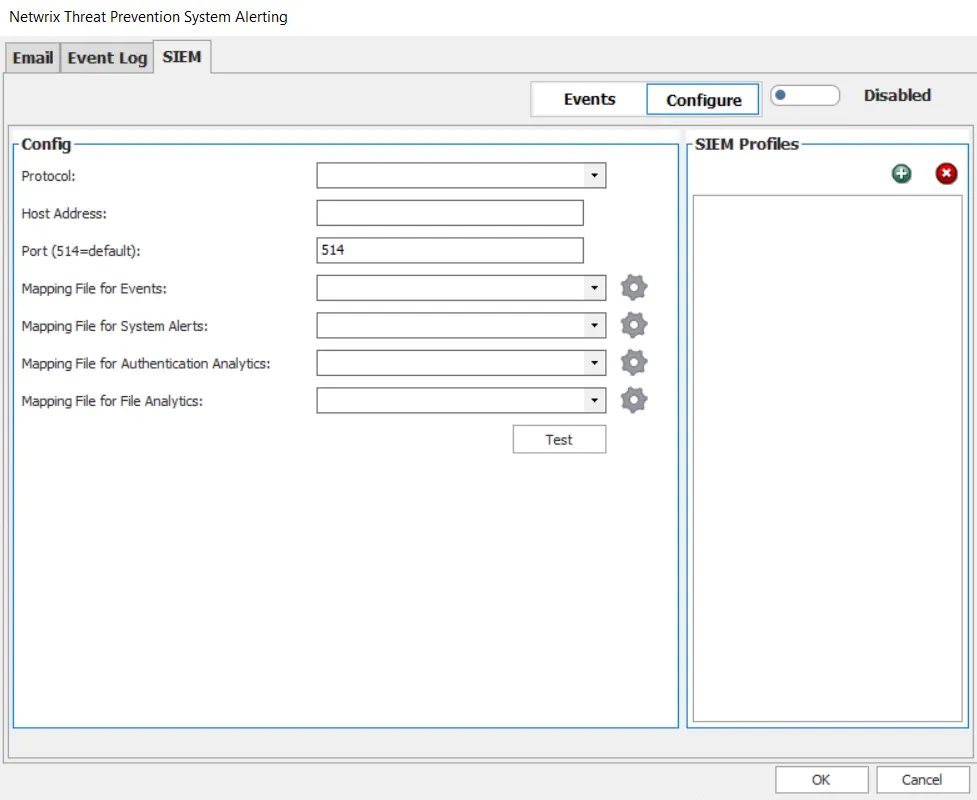
Step 1 – On the SIEM tab, click Configure.
Step 2 – In the SIEM Profiles area, click the Add (+) button to create a new SIEM profile. To rename the default text, select the name string and enter the new profile name.
For each profile, use a unique name for easy identification.
Step 3 – Use the Protocol drop-down menu to select either protocol:
- UDP
- TCP – If selected, the Require SSL/TLS checkbox is displayed. If desired, check this box and ensure the certificate is saved in the certificate store.
Step 4 – In the Host Address box, provide either an IP address or server name for the SIEM server.
Step 5 – In the Port box, provide the port number to communicate with the SIEM server.
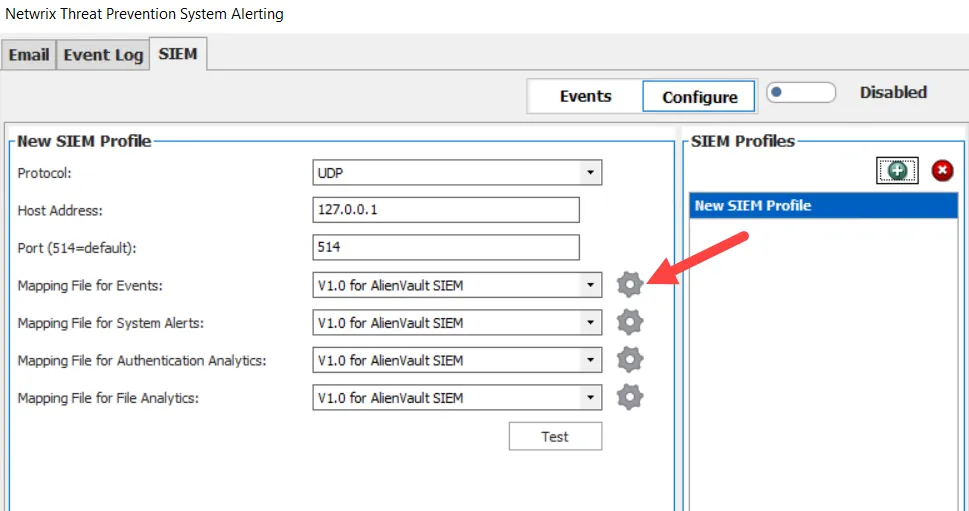
Step 6 – Use the Mapping File for Events drop-down menu to select the SIEM product to receive policy event notifications. The gear icon to the right of the drop-down allows you to import a custom mapping file. These mapping file formats are specifically designed for policy events.
Step 7 – Use the Mapping File for System Alerts drop-down menu to select the SIEM product to receive Threat Prevention Security, Threat Prevention Operations, and Threat Prevention Configuration event alerts.
The gear icon to the right of the drop-down allows you to import a custom mapping file. These mapping file formats are specifically designed for Threat Prevention system events.
Step 8 – Use the Mapping File for Authentication Analytics drop-down menu to select the SIEM product to receive Authentication Analytics incident alerts.
The gear icon to the right of the drop-down allows you to import a custom mapping file. These mapping file formats are specifically designed for Analytics incidents.
Step 9 – Use the Mapping File for File Analytics drop-down menu to select the SIEM product to receive File Analytics incident alerts.
The gear icon to the right of the drop-down allows you to import a custom mapping file. These mapping file formats are specifically designed for Analytics incidents.
Step 10 – (Optional) Use the Test button to confirm the configuration settings.
Step 11 – Click OK to save the settings.
Once a SIEM server is configured, assign it to events using the System Alerting window’s SIEM Tab or the Actions Tab of a policy or the Actions Tab of a policy template.
IBM QRadar Integration
Netwrix has created a custom app for integration between Threat Prevention and QRadar. See the Active Directory App for QRadar topic for additional information. There is also a custom app for File Activity, that can receive data from either Threat Prevention or Netwrix Activity Monitor. See the Netwrix Activity Monitor Documentation for additional information.
Splunk Integration
Netwrix has created custom apps for integration between Threat Prevention and Splunk. See the Active Directory App for Splunk topic and the Threat Hunting App for Splunk topic for additional information. There is also a custom app for File Activity, that can receive data from either Threat Prevention or Netwrix Activity Monitor. See the Netwrix Activity Monitor Documentation for additional information.
Add a Custom SIEM Mapping File
Custom SIEM mapping files can be added. First create the mapping file, and save it at a location that the Administration Console can access. The default mapping files are stored in the following folder:
*…\Netwrix\Netwrix Threat Prevention\SIWinConsole\SIEMTemplates*
Follow the steps to add a custom SIEM mapping file.
Step 1 – Click Configuration > Alerts on the menu. The Netwrix Threat Prevention System Alerting window opens.
Step 2 – On the SIEM tab, click Configure.
Step 3 – Click the gear icon for an alert type to open the SIEM Templates window. The new mapping file will only be available for the specific type selected.
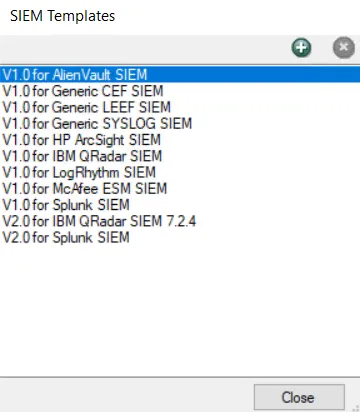
Step 4 – Click Add (+) to open the Import SIEM Mapping File window.
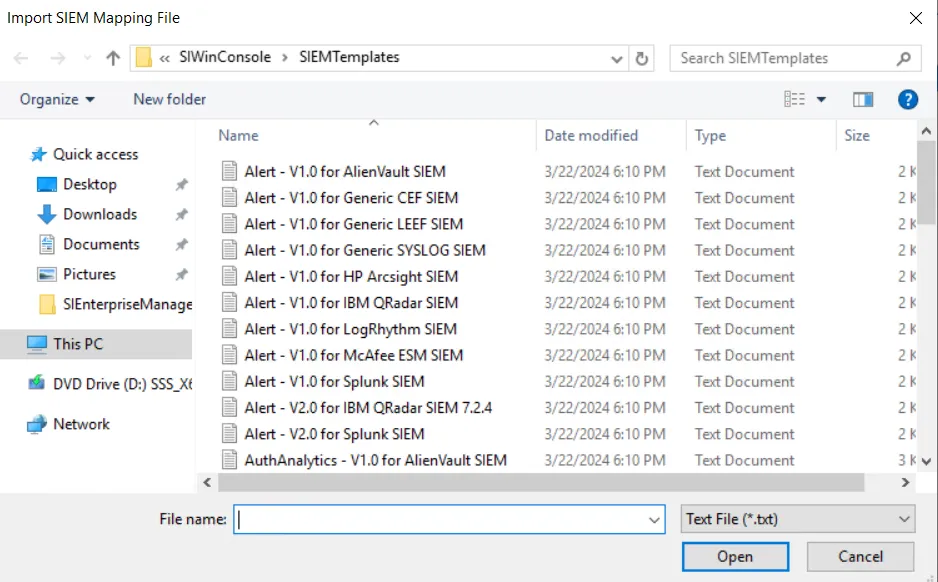
Step 5 – Select the desired mapping file and click Open. The SIEM Mapping File window closes and the selected mapping file appears in the SIEM Templates window. It is now available in the drop-down menu. Click Close.
Step 6 – Click OK to save the settings.
The new mapping file can now be selected from the drop-down menu for the respective alert type.