General Tab
The General tab is for editing the basic attributes of the policy.
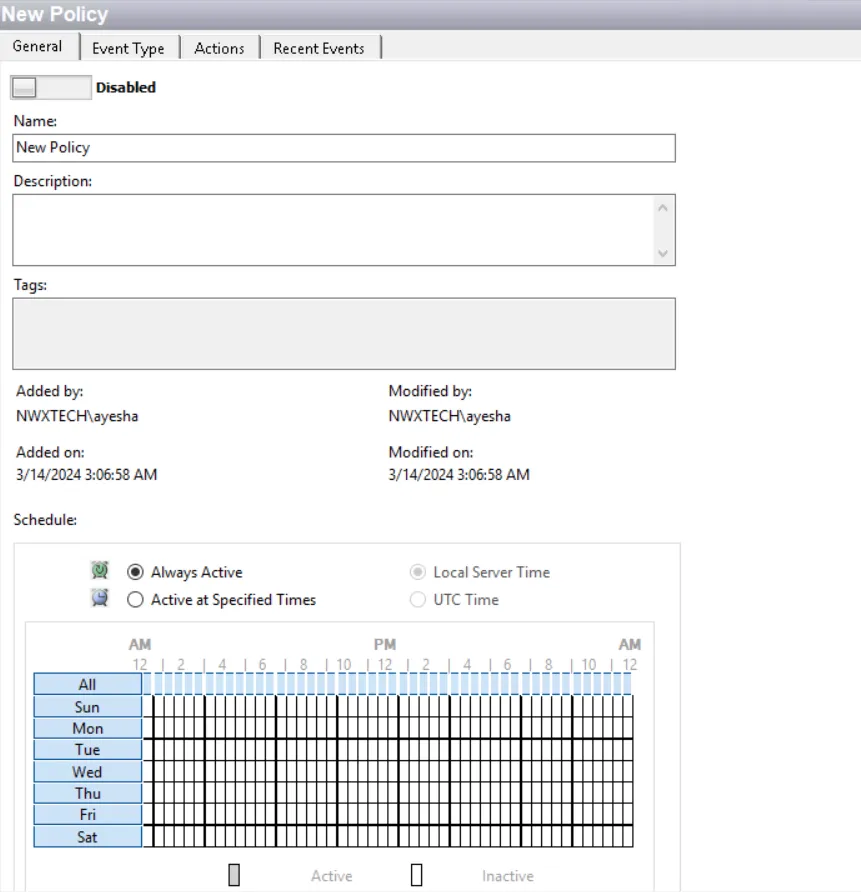
Policy Status
It indicates whether or not the policy is enabled. Click the toggle button at the top to enable or disable the policy. On the Policies Interface, an enabled policy is represented with a green dot and a disabled policy is represented with a gray dot.
Name
The name should be unique and descriptive. This name is displayed for a policy in the list on the Policies Interface. Event data can be filtered by policy; therefore, a descriptive name can be very useful to users of the Netwrix Threat Manager Reporting Module.
Description
The description is optional but recommended. Since each policy can be configured to be as broad or narrow as desired, the name combined with the description should clearly explain what objects and events it monitors/blocks, where in the network it looks, and when it is active. This description is displayed for a policy in the list on the Policies Interface.
Save all changes made to a policy or a template before leaving the configuration interface.
History
History details in the center of the General tab are automatically populated on creation or modification.

It contains read-only information on who created the policy (Added by), when the policy was created (Added on), who made the latest modification (Modified by), and when the latest modification occurred (Modified on).
Schedule
The schedule is for setting the time period for an enabled policy to monitor or block events.
| Icon | Label | Represents |
|---|---|---|
| Always Active | Indicates the policy will be active at all times when enabled. This is the default setting | |
| Active at Specified Times | Indicates the policy will be active only at the specified times when enabled. There are two options for setting the specified times: - Local Server Time – Schedule is set according to the local server’s time - UTC Time – Schedule is set according to the Universal Time (UTC) |
Any new policy created from a template automatically applies the template’s setting, which can then be modified as desired. Schedule details are displayed for a policy in the list on the Policies Interface. Active at Specified Times is represented by a clock icon, and Always Active is represented with no icon, or blank.
Weekly Calendar
The weekly calendar at the bottom of the schedule section is where the schedule is set.
When the schedule is set to Always Active, the weekly calendar is grayed-out.
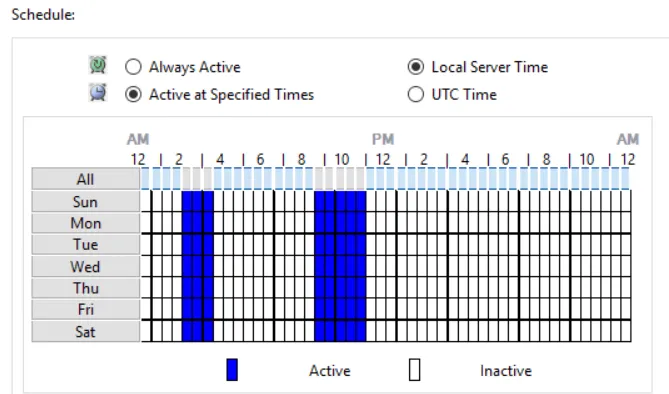
When the schedule is set to Active at Specified Times, the weekly calendar is enabled. Each block of time on the calendar represents a 30-minute period.
- Blue blocks – Active times for the enabled policy
- White blocks– Inactive times for the enabled policy
The schedule can be set or modified in one of the following ways:
- Click an individual time-block to toggle between active and inactive for a single 30-minute period.
- Click a time-block in the All row to toggle between active and inactive for an entire column (for all days of the week).
- Click the name of a day to toggle between active and inactive for an entire row (for a full day).