Enabling Debug Logging on the Netwrix Threat Prevention Windows Agent
Overview
This article describes how to enable debug logging on the Netwrix Threat Prevention Windows agent.
Instructions
There are two options: edit the agent's log config file directly on the server running the agent, or update the log level for one or more agents remotely from the Administration Console.
NOTE: Version 8.1 changed the logging engine used by the agent, so the
SIWindowsAgent.log.configfile has a different format. In version 8.1 and later:
- The root element is
<nlog>instead of<log4net>, and theminlevelattribute on a<logger>rule sets the log level rather than a<level>element.- Saving the file applies the change immediately. Restarting the
SIWindowsAgentservice is not necessary.- Option 2 writes a log level back to the configuration file, so it survives a service restart.
Option 1
-
Access the server with the SI Windows agent running.
-
Open the Windows Agent installation folder. The default location is
...\STEALTHbits\StealthINTERCEPT\SIWindowsAgent\ -
Edit the file named
SIWindowsAgent.log.configin your favorite text editor. -
Change
WARNtoDEBUGin the appropriate portion of that file: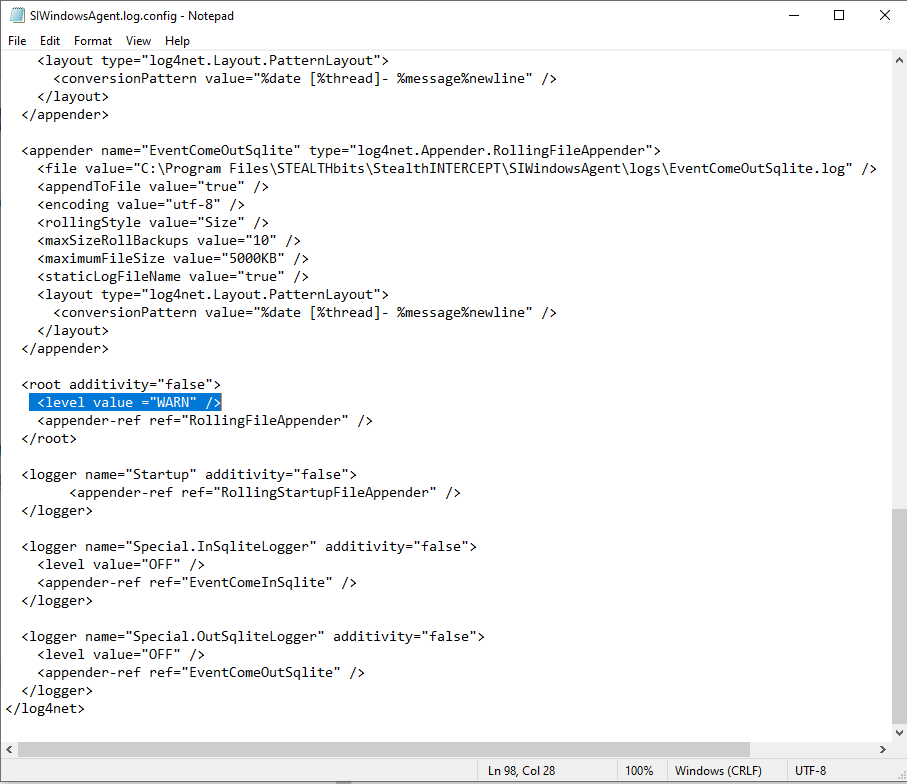
-
Save the
.log.configfile and restart theSIWindowsAgentservice.
Option 2
- Open the Netwrix Threat Prevention Administration Console on the SI management server.
- Select Agents.
- Click the Pencil icon at the top left of the window.
- Change the drop-down under New Agent Log Level to
DEBUG. - Select the agents whose log level you want to change from the list below.
- Click the Update Log Levels button to apply the change.
After collecting debug logs, set Netwrix Threat Prevention Windows agent logging back to WARN.