Selection Windows
Many event type filters have selections windows for populating filter values. It may be necessary to select a specific Agent to populate values in the selection window. Some selection windows also include an option to switch between a Browse Mode and a Search Mode for locating Active Directory filter values.
Select an Agent
On several Select… windows, you must select a server where you deployed the Agent, as these windows present live information the Agent provides. If Threat Prevention finds no Agent, the window doesn't open.

The following rules can aid in selecting the correct Agent for the Select… window when configuring solution related policies:
- Active Directory – Select any Agent on any domain controller within the domain of interest
- Exchange – Select any Agent on any Exchange server
- Windows File System – Select the Agent on the target machine where the files you want to monitor reside
- NAS File System – Select the Agent on the Windows server acting as a proxy server for NAS activity
Browse Mode
Select a server/Agent from the dropdown menu and click Connect.
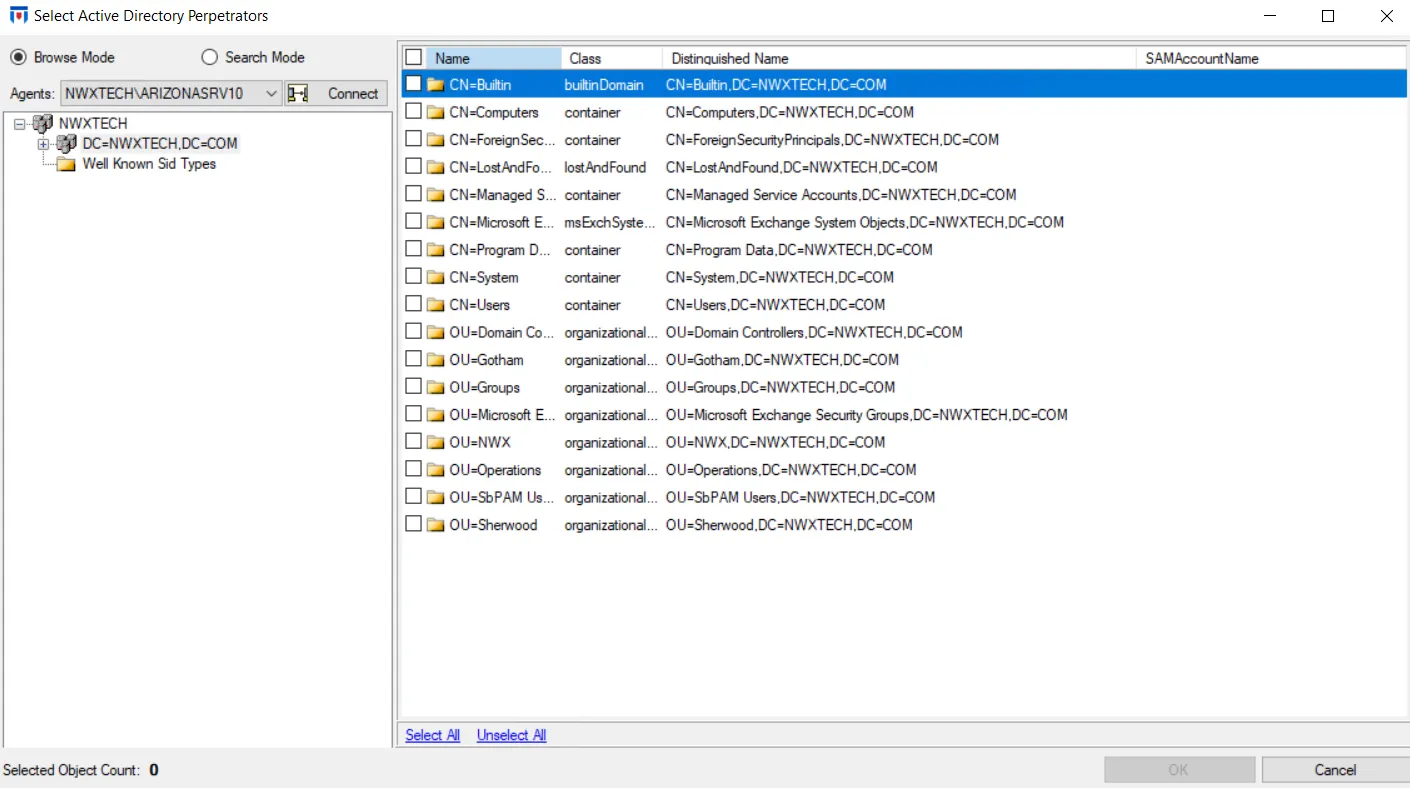
- Select the option button for Browse Mode.
- Expand the domain tree in the Navigation pane to select a container. The Results pane populates with the available items.
- Check the items you want in the Results pane on the right and click OK.
The selections appear in the appropriate box of the filter tab from where you opened the Select… window.
Search Mode
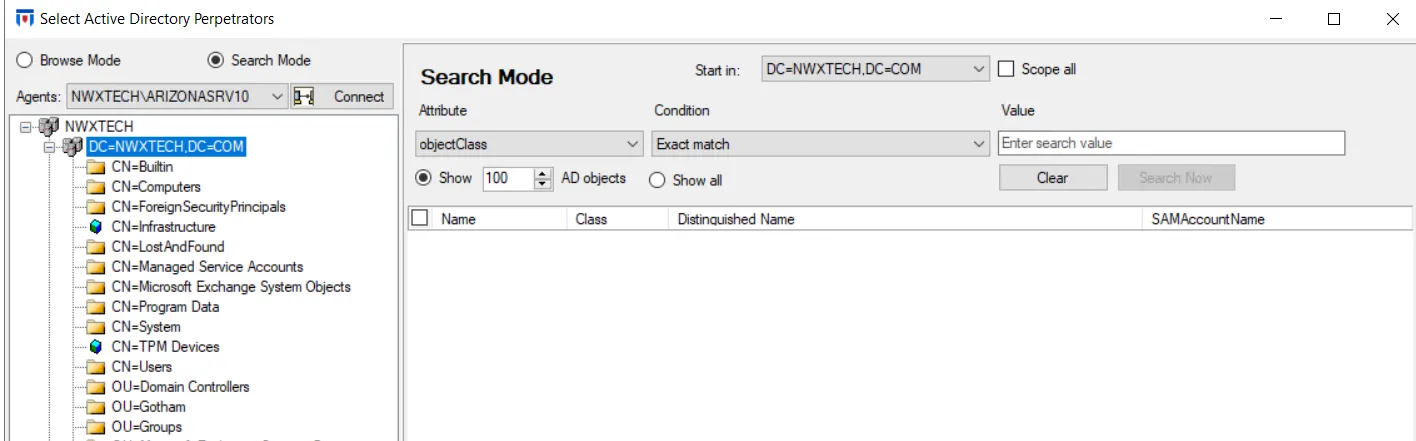
Select a server/Agent from the dropdown menu and click Connect.
-
Select the option button for Search Mode.
-
Expand the domain tree in the Navigation pane to select the starting point for the search, which auto-populates the Start in field. Use the following scoping options:
-
Scope all – Includes all sub-containers in the search
-
Attribute – Scope to the ‘objectClass’, name, or SAMAccountName attribute
-
Condition – Set the scoping condition to:
- Starts with
- Contains
- Exact Match (this is the only condition available for objectClass)
-
Value – Search string
-
-
After selecting the options you want, click Search Now. The Results pane begins to populate with matching results.
-
Choose between Show [number] AD objects and specify a value or Show all. Already selected objects for this filter that match the search are visible but grayed-out.
-
Check the items you want in the Results pane on the right and click OK.
The selections appear in the appropriate box of the filter tab from where you opened the Select… window.