Manual Agent Deployment
You must install the Threat Prevention Agent on the appropriate systems for monitoring. See the Agent Information topic for specifics on where to deploy.
You can deploy the Threat Prevention Agent through any of the following methods:
-
Deploy the Agent to servers through the Administration Console – You can deploy the Agent to one or multiple servers through the Administration Console
infoThis is the recommended method for deploying the Agent.
-
Manually through the Windows Agent Setup Wizard – Run the Agent executable to launch this wizard
See the Agents Interface topic and the Deploy Agents topic for additional information to deploy the Agent through the Administration Console.
To manually deploy the Agent:
Manually deploying the Agent requires an Enrollment Secret, which is a limited-life (1 hour) password generated by the Enterprise Manager. The Agent Installer uses it to ensure that the Agent connects to a legitimate Enterprise Manager. Before launching the Threat Prevention Windows Agent Setup wizard, note the values for the enrollment secret and the EM certificate. See the Enrollment Secret Configuration Window topic for additional information.
Step 1 – From the Threat Prevention server, copy the Agent executable (
...\Netwrix\Netwrix Threat Prevention\SIEnterpriseManager\Setup\SI Agent.exe) to the machine where
you want to install the Agent. Then run the executable. The Netwrix Threat Prevention Windows Agent
Setup wizard opens.
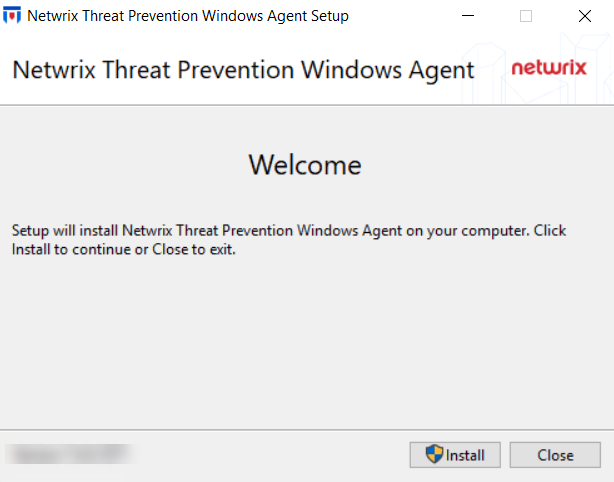
Step 2 – On the Welcome page, click Install. The Setup Progress page opens, followed by another Welcome page.
Step 3 – Click Next.
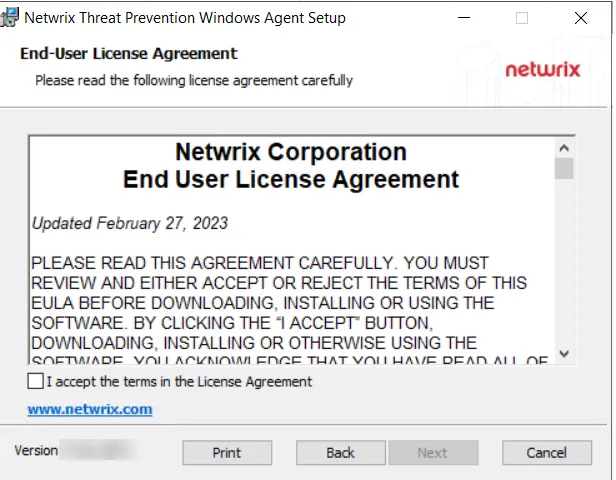
Step 4 – On the End-User License Agreement page, check the I accept the terms in the License Agreement box and click Next.
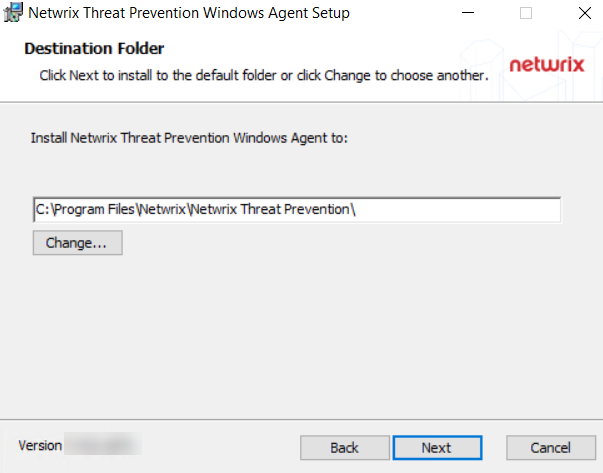
Step 5 – (Optional) On the Destination Folder page, change the installation directory location.
- To change the default installation directory location, click Change….
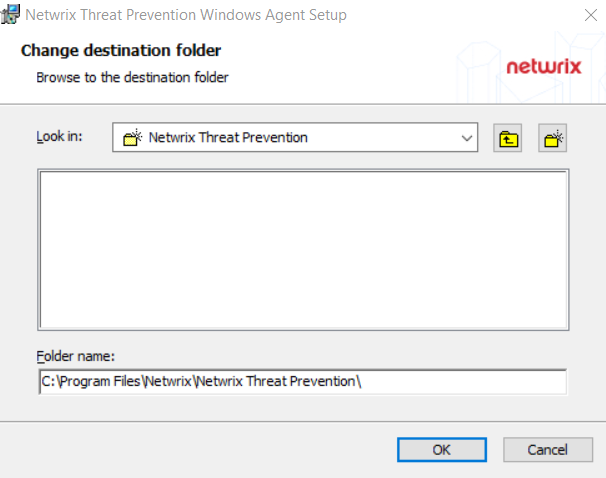
- Use the Look In field to select the installation folder you want.
- When the Folder name is as desired, click OK. The wizard returns to the Destination Folder page.
- Click Next.
To use the default installation directory location, skip the previous step and click Next on the Destination Folder page.
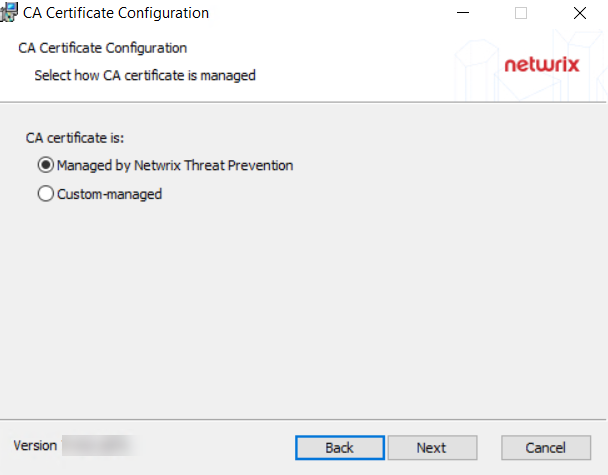
Step 6 – On the CA Certificate Configuration page, select one of the following options for the certificate and click Next:
- Managed by Netwrix Threat Prevention – To use certificates that Threat Prevention signs and manages
- Custom-managed – To use certificates that the customer's external certificate authority signs
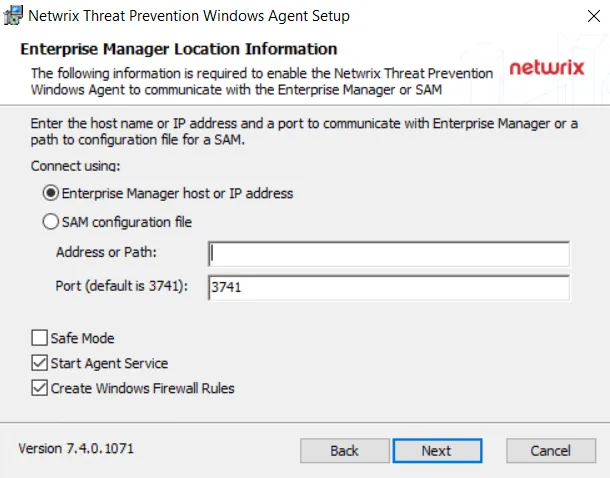
Step 7 – On the Enterprise Manager Location Information page, select the Option button for a product to enable communication with it.
-
Enterprise Manager host or IP address – For Threat Prevention
-
SAM configuration file – For Activity Monitor
-
In the Address or Path box, enter the following:
-
For Threat Prevention – Enter the host name or IP address of the machine where the Enterprise Manager service is located
-
For Activity Monitor – Enter the path to the activity agent configuration file for this host.
tipThe Activity Monitor activity agent must already be deployed on the domain controller and enabled before installing the AD agent. The default path is:
…\Netwrix\Netwrix Threat Prevention\SIWindowsAgent\SAMConfig.xml
noteAs a requirement for using custom managed certificates, you must provide the Enterprise Manager server DNS name, hostname, or FQDN (instead of the IP address) when installing the following:
- Threat Prevention server
- Remote instance of the Administration Console
- Agent
See the Administration Console and Agent Not Communicating with the Enterprise Manager topics for additional information.
-
-
The default Enterprise Manager port is 3741. Modify if necessary. The port configuration only applies to the Enterprise Manager Host option.
noteOn selecting the Enterprise Manger host or IP address option button and providing valid information for the Enterprise Manager in the Address or Path and Port boxes, the Agent automatically connects to the Enterprise Manager.
-
Configure additional Agent options as desired:
-
Safe Mode – This option prevents the Windows AD Events monitoring module from loading if the LSASS DLL versions have changed since the last time the Threat Prevention Windows Agent service started.
-
Start Agent Service – This option starts the Threat Prevention Windows Agent service after you install the Agent. If installation doesn't start the Threat Prevention Windows Agent service, you must start the Agent manually, or it starts automatically after a server reboot. Until the Agent starts, no activity monitoring or blocking occurs.
noteIf you select Custom-managed on the CA Certificate Configuration page, the Start Agent Service checkbox is disabled because the Agent installer doesn't obtain a signed certificate from Enterprise Manager in the custom-managed mode. After installing the Agent, you must create and provide certificates signed by your certificate authority.
-
Create Windows Firewall Rules – This option creates the rules needed to open this port during the installation process. If you use a third party firewall, uncheck this option and manually create the necessary firewall rules.
-
After you configure the settings, click Next.
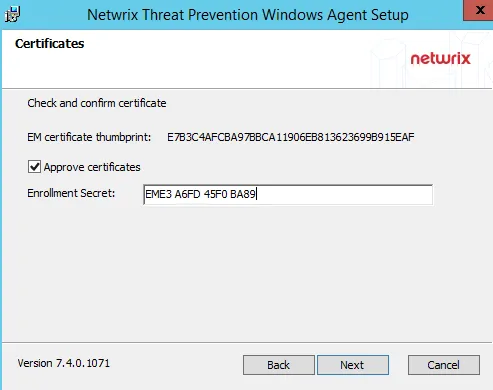
Step 8 – On the Certificates page, confirm the EM certificate hash by verifying that it contains the same value displayed in the Enrollment Secret Configuration Window in the Administration Console.
This page doesn't display when you select "Custom-managed" on the CA Certificate Configuration wizard page. It also doesn't display when you reinstall the Agent on a machine and haven't manually deleted the Certsinfo folder, in which case the Agent re-uses the original certificates. The Certsinfo folder is located at: …\Netwrix\Netwrix Threat Prevention\SIWindowsAgent\CertsInfo\
-
Approve certificates – Select this checkbox to approve the thumbprint, which then enables the Enrollment Secret box. Enter the enrollment secret obtained from the Enrollment Secret Configuration Window.
noteIf the enrollment secret has expired, you can generate a new one.
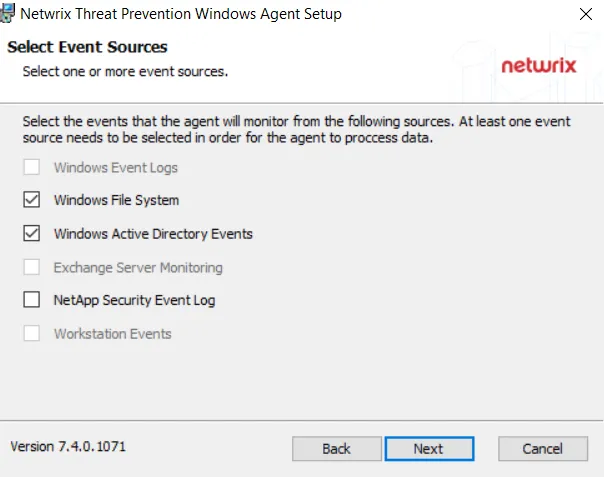
Step 9 – On the Select Event Sources page, select the types of events for this Agent to monitor. The installer grays out options that aren't applicable to the server where you are deploying the Agent. Click Next.
- Windows Event Logs – Available for legacy versions. Option should be grayed-out.
- Windows File System – Available as part of the Threat Prevention for File System and the Threat
Prevention for Active Directory solutions.
- Check this option if you will use the system where you are installing the Agent to monitor the local Windows file system
- Check this option if the system where you are installing the Agent is a domain controller where you will conduct Group Policy Object monitoring or blocking
- Windows Active Directory Events – Available as part of the Threat Prevention for Active Directory
and the Threat Prevention for Exchange solutions. Also available as part of the Activity Monitor
for Active Directory solution.
- Select this component if the system where you are installing the Agent is an Active Directory domain controller. This option is grayed-out if the target system isn't a domain controller.
- Exchange Server Monitoring – Available as part of the Threat Prevention for Exchange solution.
- Select this component if the system where you are installing the Agent is running the Exchange Server. This option is grayed-out if you aren't installing this Agent on an Exchange Server.
- NetApp Security Event Log – Available for legacy versions. Option should be grayed-out.
- Workstation Events – Available for legacy versions. Option should be grayed-out.
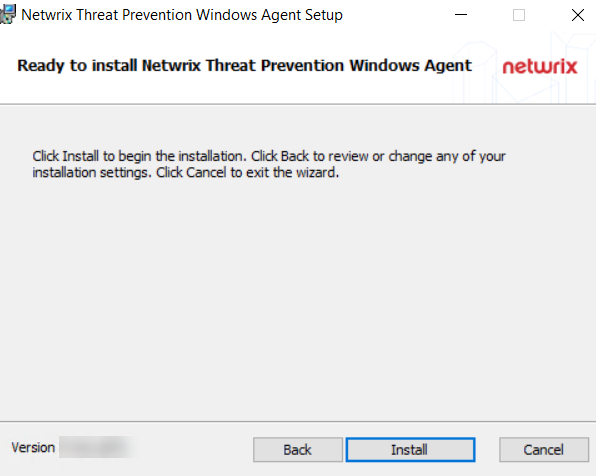
Step 10 – On the Ready to install Threat Prevention Windows Agent page, click Install. The Setup wizard displays the installation status. When the installation completes, the Operation Successful page opens.
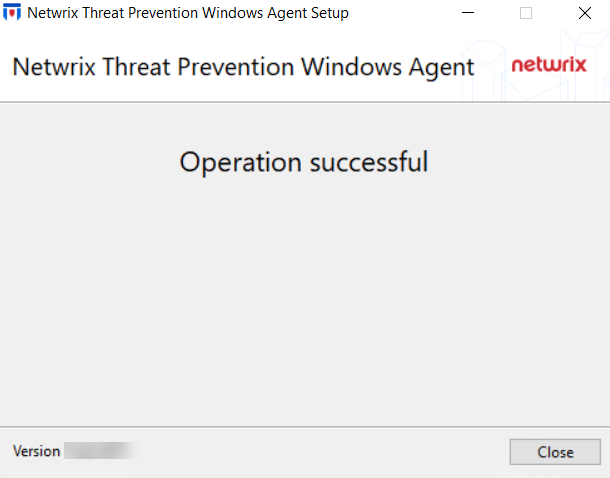
Step 11 – When installation is complete, click Close.
If Threat Prevention manages the certificates, Agent deployment is complete. If you selected the custom-managed certificate option, see the Create Custom Managed Certificates for Each Agent topic for additional information.