New Investigation Page
Use the New Investigation page within the Investigations interface to run queries on available data with desired filters for a specific timeframe.
Click Investigate in the application header bar to open the Investigations interface. The interface opens to the New Investigation page by default. You can also click New Investigation in the navigation pane to open the New Investigation page.
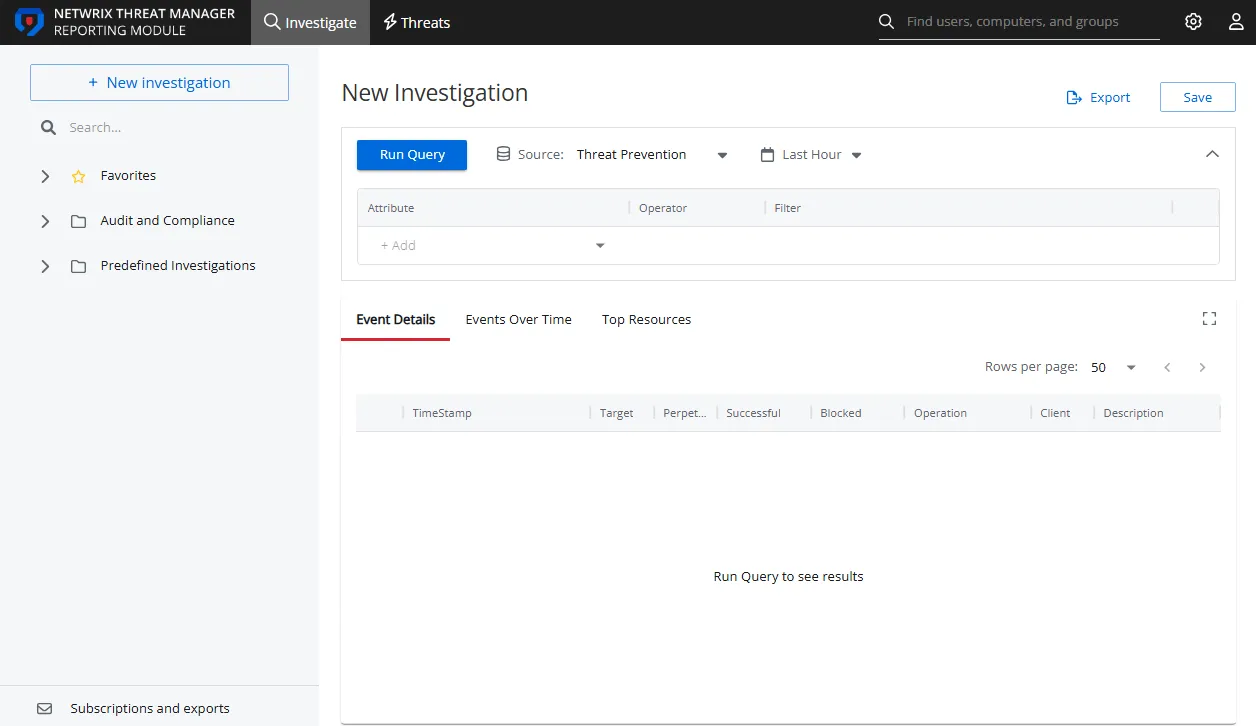
To generate a new investigation report, configure the filters as desired and set the timeframe. See the Filters Section topic for additional information.
Then click Run Query. The report data appears in the sections below the Filters section. See the Investigation Reports topic for additional information.
If you run a query without applying filters, the report sections display all activity by all users for the designated timeframe, which defaults to Last Hour.
You can export the report generated by a New Investigation. The Schedule Export option isn't available from the New Investigation page. See the Export Report topic for additional information.
Use the Save option to save your configured filters and run the investigation again later.
Save an Investigation
To retain filter configuration after running a query and confirming that the report displays the data you want, use the following steps to save an investigation.
This option is available only to users with the Administrator or the Response Managers roles.
Step 1 – On the New Investigation page, click Save in the upper right corner. The Save Investigation window opens.

Step 2 – Enter a unique, descriptive name for this investigation in the Name field.
Step 3 – Enter a report description in the Description field.
Step 4 – From the Folder dropdown menu, select the location where you want to save the investigation. The My Investigations folder is the default for custom investigations.
Step 5 – Select a user role from the Owner dropdown menu. All users assigned this role own this investigation and can modify the report.
Step 6 – In the Access box, type to search the user role you want to give access of this investigation. A list of user roles matching the search string appears. Select a single or multiple user roles. All users belonging to the selected roles can view the report.
Step 7 – Click Save. The Save Investigation window closes.
The application saves the investigation to the selected folder, and the folder expands in the navigation pane to display the saved item. Users can open this folder from the navigation pane to access the investigation. They can run the investigation, schedule exports, or add subscriptions.
See the Investigation Options topic for additional information.